
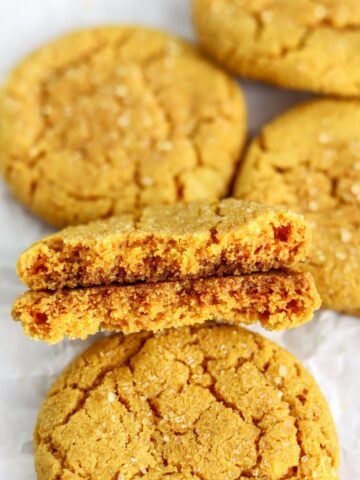
These hibiscus sugar cookies are chewy, floral and delicious! They are studded with chocolate chips and flavored with lemon zest and hibiscus. These cookies can be made without a mixer!

These hibiscus cookies are coated with sugar and hinted with vanilla, lemon zest and hibiscus. Chocolate chips makes these chewy cookies even more delicious!
Hibiscus is a flowering plant most commonly used to make tea. I first tried it in iced tea when I was traveling in Egypt. It has a tart, slightly floral taste that reminds me of the flavor of cranberries.
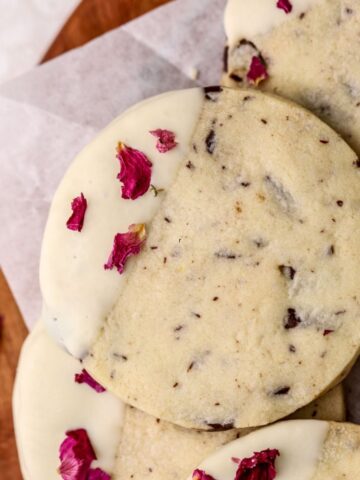
If you’re looking for more delicious cookie recipes, try my Lemon Rose Water Cookies, Peach Cobbler Cookies and Strawberry White Chocolate Chip Cookies.
Jump to:
Why You Will Love These Cookies
- They are thick cookies with chewy middles!
- They’re super easy to make. It’s a no chill recipe that comes together without a mixer!
- Hibiscus adds a tart and floral taste which makes these cookies unique just like my hibiscus cupcakes. For another recipe with unique flavors, try my Lebanese sfouf recipe.
- Lemon brightens up the buttery richness of these cookies.
- Chocolate chips taste heavenly combined with floral hibiscus.
Ingredients
Below are helpful notes about some of the ingredients.
- Dried hibiscus: Hibiscus is a flowering plant often used to make tea. It has a tart, slightly floral taste. You can find dried hibiscus online or in spice stores and international stores.
- Granulated sugar and Brown sugar: Use a combination of granulated and light or dark brown sugar.
- 1 Egg and 1 egg yolk: 1 large room temperature egg and 1 large egg yolk.
- Chocolate chips: Chocolate chips are optional. I found 1/2 cup to be the perfect amount of chocolate. Use semi-sweet chocolate chips or 3.5 ounces of chopped dark chocolate.
For the full list of ingredients and their measurements, see the recipe below.
Instructions


Would you like to save this?
Step 1: (See photo 1 above) Combine the ground hibiscus and butter in a small saucepan over medium heat. Stir occasionally as the butter melts. When it begins to sizzle around the edges, remove from heat. Allow to cool for 5 minutes.
Step 2: (See photo 2 above)Pour the hibiscus butter into a mixing bowl. Whisk or use an electric mixer to mix in the sugars and lemon zest til completely combined. Next, mix in the egg, egg yolk and vanilla extract.


Step 3: (See photo 3 above) Use a rubber spatula to stir in the dry ingredients and chocolate.
Step 4: (See photo 4 above) Scoop dough into balls and place on a baking sheet. Chill at least 1 hour. Roll in granulated sugar then bake at 350 Fahrenheit for 12 minutes til just light golden brown around the edges.
Expert Tips
Tip #1: Use a a mortar and pestle or a spice grinder to finely grind the hibiscus before steeping it.
Tip #2: I don’t recommend using more than 1/2 cup of chocolate chips. This makes it so that the chocolate is one of the flavors of the cookies rather than being the focus of the cookies.
Recipe FAQs
Hibiscus is a deep red plant that is enjoyed in many parts of the world as tea. You can most commonly find it dried or sold as hibiscus tea.
Hibiscus has a lovely tangy, floral taste. Their tart, fruity flavor is similar to cranberries.
You can find hibiscus in spice stores, international grocery stores, and online.
Store leftover hibiscus cookies in an airtight container at room temperature for up to 5 days or in the freezer for a few weeks.


Did you try this recipe or any other recipe on my website? Please leave a 🌟 star rating and 📝 comment below.
Don’t forget to tag me on Instagram, Facebook, and Pinterest!

Hibiscus Sugar Cookies
Ingredients
- 1 cup (227 g) unsalted butter
- 1 tablespoon (14.79 g) finely ground dried hibiscus
- 1⅓ cup (266.67 g) granulated sugar plus more for coating
- ¼ cup (55 g) brown sugar light or dark, packed
- 2 teaspoons (4 g) lemon zest optional
- 1 (1) large egg room temperature
- 1 (1) egg yolk
- 2 teaspoons (2 teaspoons) vanilla extract
- 1 teaspoon (3/4 teaspoon) kosher salt
- 2¾ cups (343.75 g) all purpose flour
- 1½ tablespoons (187.5 g) cornstarch
- 1 teaspoon (1 teaspoon) baking soda
- ¼ teaspoon (1 teaspoon) baking powder
- ½ cup (90 g) semisweet chocolate chips or 3.5 ounces of chopped dark chocolate
Instructions
- Finely grind the hibiscus in a spice grinder, small food processor or mortar and pestle.
- Pour the hibiscus into a medium saucepan with the butter. Set pan uncovered over medium heat. Stir occasionally as the butter melts. Heat until butter just begins to bubble around the edges of the pan. Remove from heat and let stand 5 minutes.
- Pour the hibiscus butter into a large mixing bowl. Add the sugars and lemon zest (if using). Mix with a hand held mixer (or use a stand mixer fitted with the paddle attachment) for 30 seconds or until well combined. Add the egg, egg yolk and vanilla extract and mix until combined.
- Add the flour, baking soda, baking powder, baking soda and salt and mix on low speed or use a spatula to stir together until just combined. Stir in the chocolate chips or chopped chocolate. Do not overmix.
- Use a medium sized, 2-tablespoon cookie scoop or a measuring spoon to portion out the dough. Place dough balls side by side on a baking sheet lined with parchment paper. (You don't need to leave a space between dough balls, since you won't be baking the cookies on this baking sheet). Cover with plastic wrap and place them in the refrigerator for 1-2 hours, or until completely chilled and hard.
- Heat the oven to 350 degrees Fahrenheit. Pour about 1/4 cup of granulated sugar in a shallow dish or small bowl, set aside.
- Roll each ball in a little granulated sugar. Place each dough ball 2 inches apart on a baking sheet lined with parchment paper. I usually bake about six cookies at a time. Leave the remaining cookie dough balls in the fridge so they stay chilled.
- Bake for about 12 minutes or until they are just barely lightly golden brown around the edges and the cookies are puffed up in the middle.
- Remove from oven and let cool on the baking sheets for 5 minutes then transfer cookies to a baking rack to cool. Cookies will flatten a bit and firm up more once they've cooled.
Notes
Nutrition
Please note that nutritional values are created by an online calculator and should only be used as an estimate.
Adapted from New York Times Cooking
Barbara Briggs Ward
Recipe sounds scrumptious. I not only love your recipes I always learn something new. I had no clue what hibiscus was until reading this recipe. Thanks!
Natalie
Love to hear that!! It makes me happy to introduce people to new ingredients! 🙂