This homemade pie crust is flaky, tender and delicious. It’s made with just 4 basic ingredients. You can make it by hand or in the food processor. It’s perfect for pies, pop tarts and more!
Would you like to save this?
This pie crust recipe is easy to make at home and much better than store-bought! All you need are a few simple ingredients. It comes out tender and delicious however you make it!
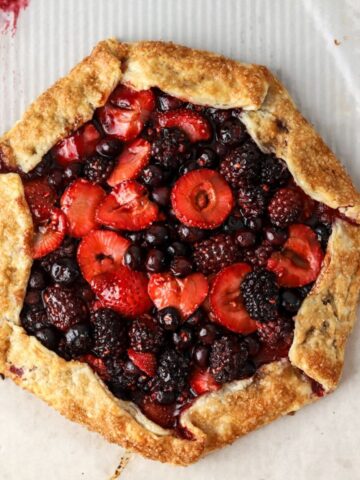
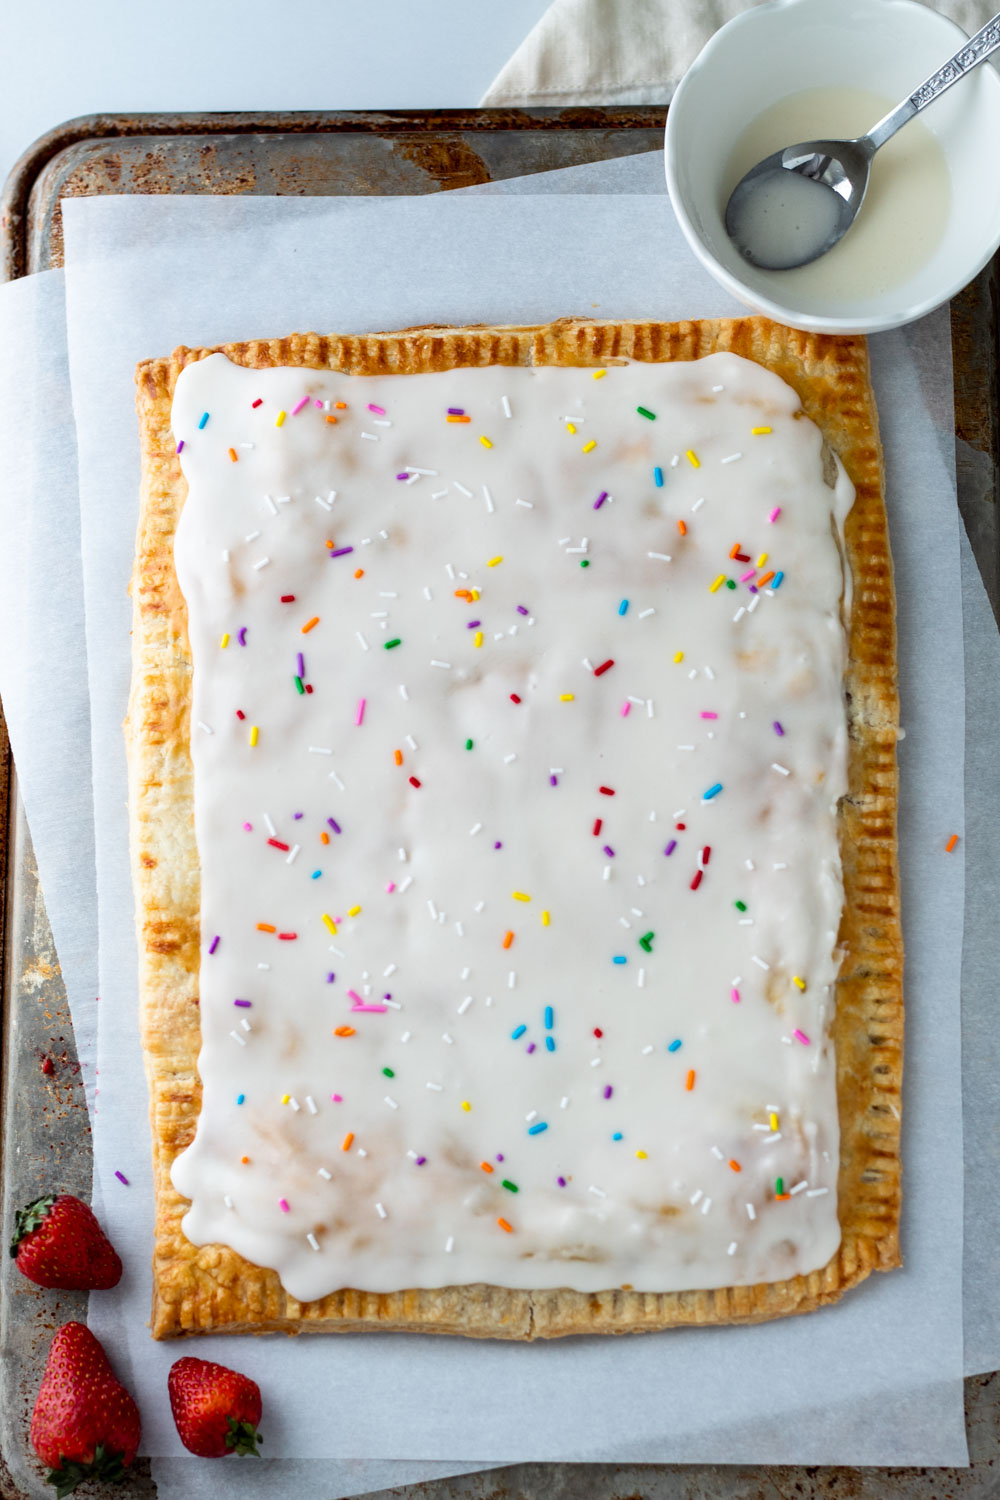
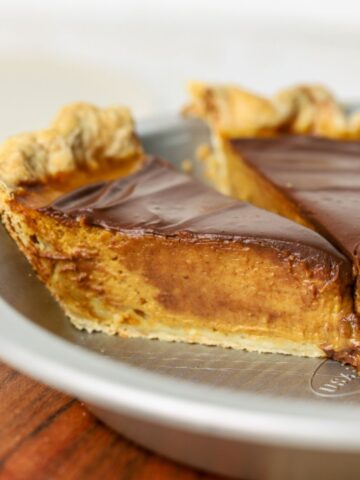
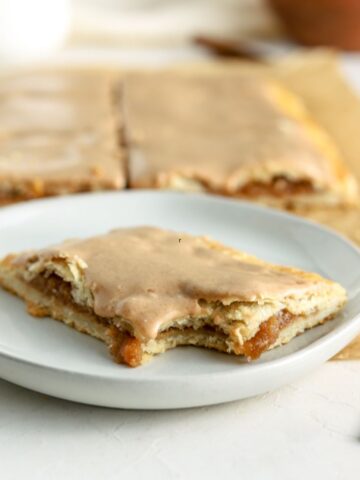
I always use it to make my recipe for chocolate pumpkin pie. It’s also perfect for everything from these cinnamon apple pop tarts to my easy berry galette!
Jump to:
Why We Love This Recipe
- Easy to make: Make it by hand, with a pastry cutter, or a food processor.
- Simple ingredients.: You only need a few basic ingredients.
- Delicious: It’s better than store bought!
- Versatile recipe. Use this recipe for single pie crust or double the recipe for double-crust pies.
Ingredients

- Flour: Unbleached, all purpose flour.
- Butter: Use very cold unsalted butter. Cut butter into 1/2 inch cubes. Butter adds flavor and makes the crust nice and flaky. Butter is the star ingredient in this recipe, so I recommend using a good quality butter. I like to use high fat European-style butter.
- Salt: Salt enhances the flavor.
- Sugar: Pie dough is not sweet. We’re using a small amount of sugar to help with browning the crust.
- Water: Use cold ice water. Keep the ice cold water in the fridge til the moment you need it. Water brings the dough together. Add only as much water as needed. We want the dough to hold together without being sticky.
Substitutions & Variations
- Vodka or apple cider vinegar (optional): To make the crust flakier, use 1-2 tablespoons of cold vodka or cold apple cider vinegar in place of 1-2 tablespoons of water. Vodka or apple cider vinegar helps prevent gluten formation and keeps the crust tender and flaky.
- Spices: For warm flavor, add 1-2 teaspoons of cinnamon and or a combination of cinnamon, ginger, allspice, cardamom, or nutmeg!
Instructions
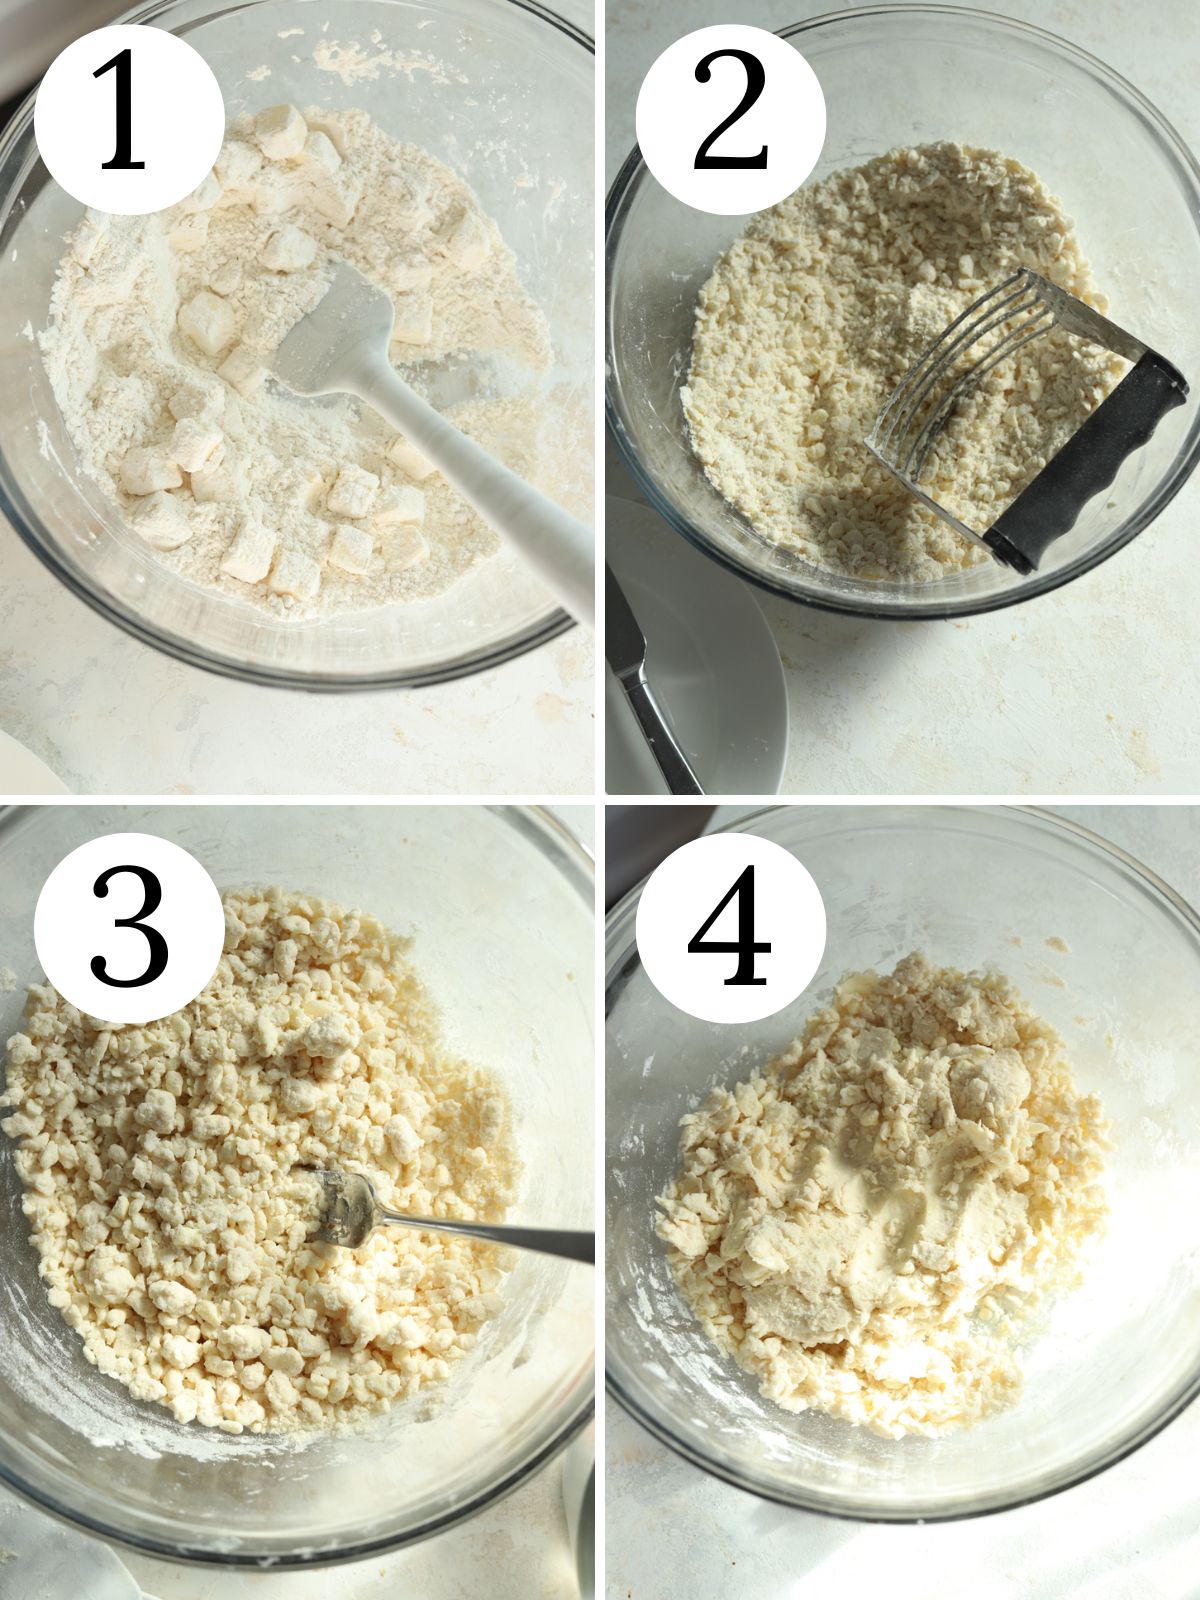
Step 1: (See photo 1 above). Whisk to combine the flour, sugar and salt in a large bowl. Add the cold cubed butter. Toss with spatula to coat butter with flour.
Step 2: (See photo 2 above). Use a pastry cutter or your hands to cut the butter into the dry ingredients til biggest pieces are no larger than the size of a pea.
Step 3: (See photo 3 above). Make a well and pour 2 tablespoons of water into the well. Use a fork to stir the water into the dough. Add another 1-2 tablespoons of water. Stir it in with a fork.
Step 4: (See photo 4 above). Knead the dough with your hands til dough comes together cohesively. Form dough into a ball.
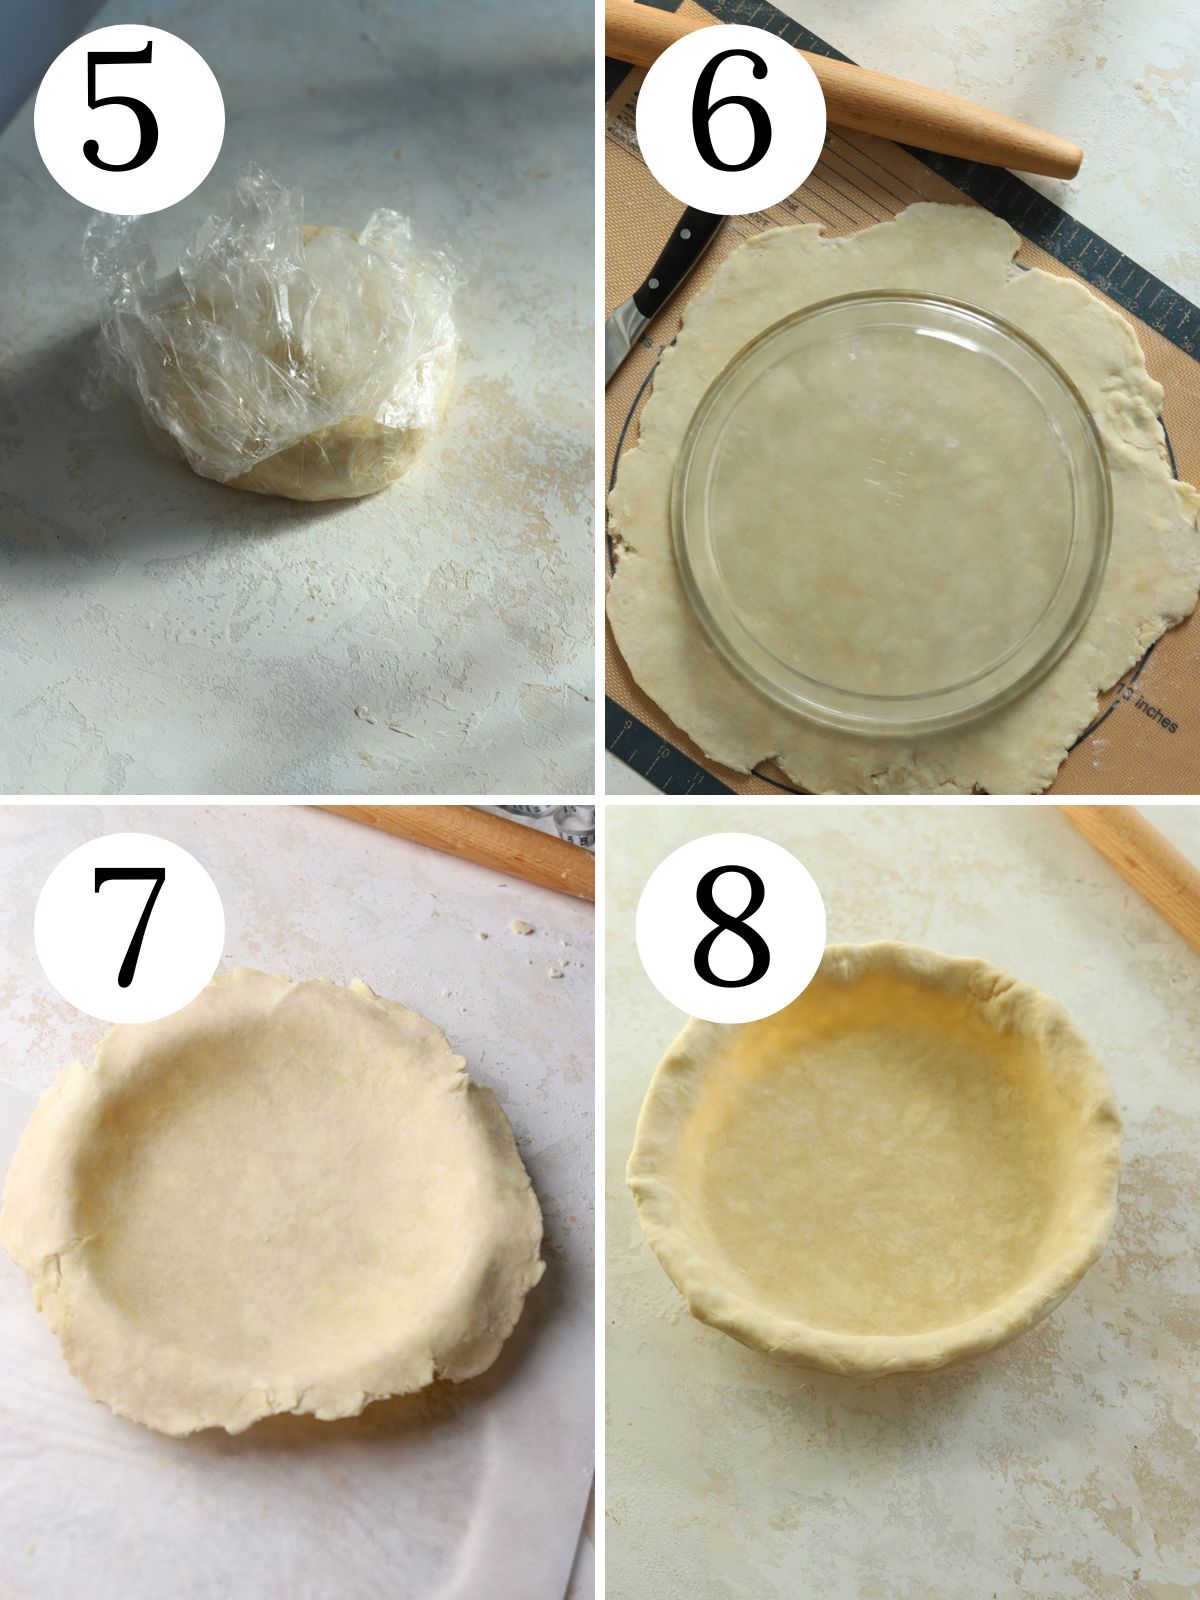
Step 5: (See photo 5 above). Set dough on a sheet of plastic wrap. Press dough down into a 1 inch disk. Wrap in plastic wrap. Chill at least 30 minutes.
Step 6: (See photo 6 above). Roll dough out on a floured surface to a 12 inch circle. Place pie dish facedown on your dough. Make sure dough is at least two inches wider than the pie plate.
Step 7: (See photo 7 above). Gently fold dough in half. Set it on the pie plate. Adjust the crust so that it’s fully covering the bottom of the pan and also touching the sides. Trim the edges with kitchen scissors, if needed.
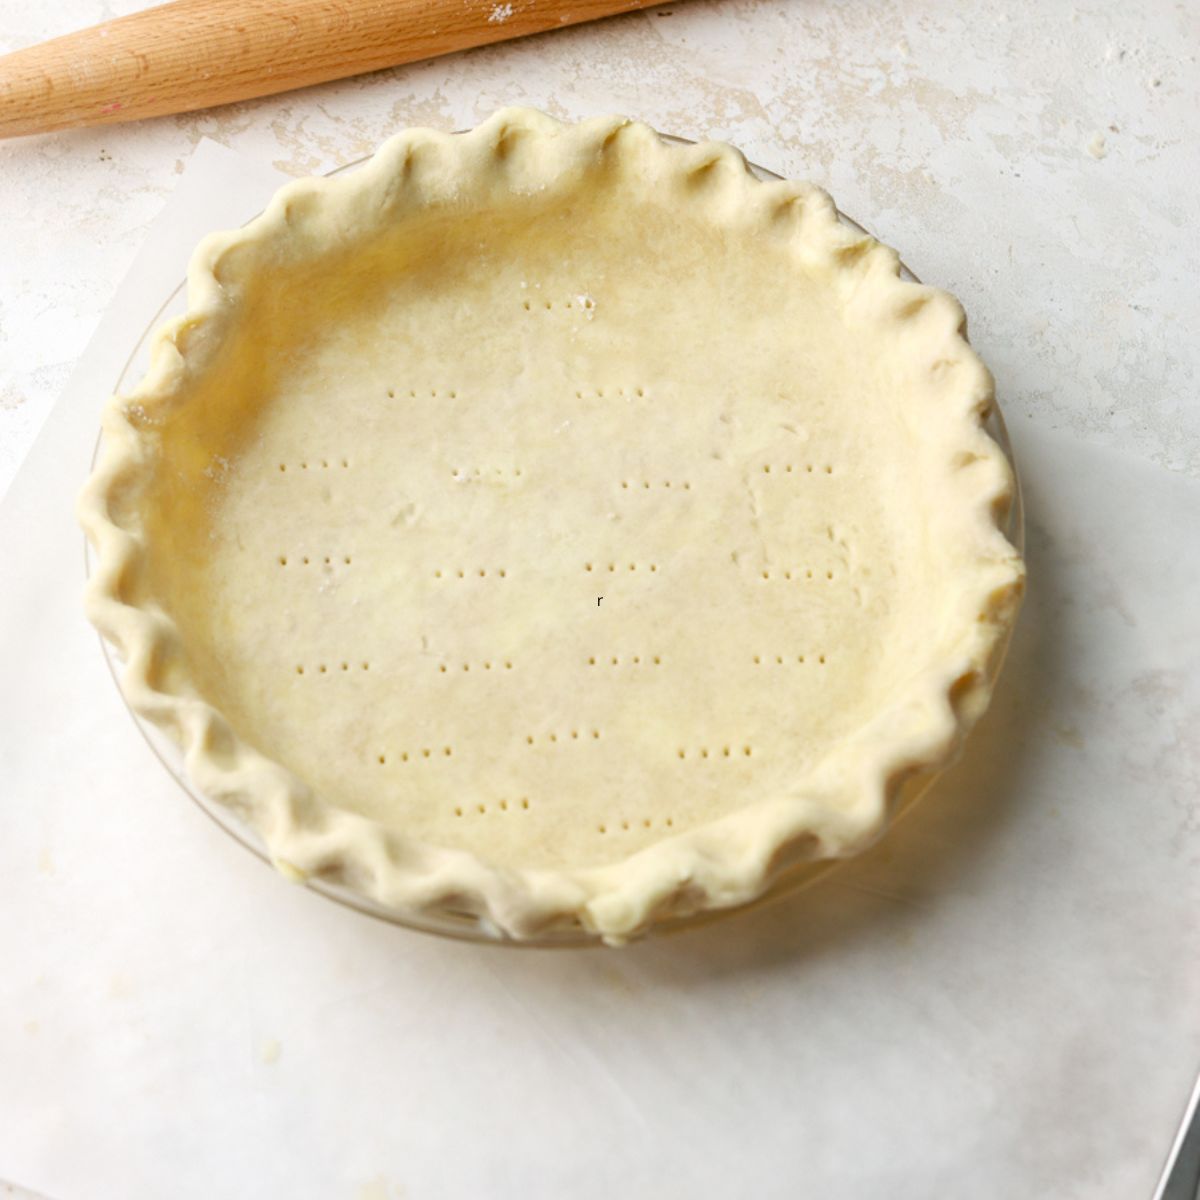
Step 8: (See photo 8 above). Fold the excess dough under itself to create the crust edge. Lift the crust up at the edge, fold it under then press firmly so that the edge of the crust is flush with the pie plate. Chill the dough for another 5 minutes before crimping. Crimp the edges using your favorite style.
Expert Tips
- Use cold ingredients and cold tools. In addition to using cold ingredients, you can also chill your bowl and pastry cutter for a few minutes before starting. This helps keep the ingredients cold while mixing.
- Use a pastry cutter. You can use a food processor, but I find the pastry cutter is the best tool. Water can sometimes hide under the blade of the food processor. This can cause you to use more water than needed.
- Rolling out the dough. Roll dough out on a lightly floured surface. Don’t press too hard when rolling out the dough. Use light to medium pressure. Flip the dough over a few times and rotate it a quarter turn frequently while rolling it. This will keep the dough from sticking to your counter. To make clean up easier, roll dough out on a silicone pastry mat or on a sheet of parchment paper!
- Rotate and flip dough. Lift up the dough and flip it over a few times while rolling it out. This will help you know your dough isn’t sticking to your counter. It will make it easier to transfer the dough off the surface and onto the pie pan.
- Use a rolling pin to transfer your dough. Gently roll the dough onto your rolling pin. Unfold it onto the pie pan. This helps place it onto the pie pan without needing to fold it.
Recipe FAQs
Yes! Salted butter works fine. If you use salted butter, you only need to add a small pinch of salt to the recipe.
You can wrap the disc of pie dough in plastic wrap and refrigerate for up to 2 days. Let sit on the counter for about 20 minutes before rolling out. You can refrigerate the dough-lined pie plate up to 1 day in advance of baking. Once the pie plate has been lined with the dough and the edges crimped as desired, chill again for 2 hours before proceeding with the recipe.
To freeze the crust, place the disk wrapped in plastic wrap in an airtight ziplock freezer bag and freeze for up to 3 months. Thaw overnight in the fridge, then follow the make-ahead instructions above.
More Recipes You’ll Love
Did you try this recipe or any other recipe on my website? Please leave a 🌟 star rating and 📝 comment below.
Don’t forget to tag me on Instagram, Facebook, and Pinterest!

Homemade Pie Crust
Equipment
Ingredients
- 1¼ cups (156.25 g) all purpose flour plus a little more for rolling out the dough
- 1½ teaspoons (1½ teaspoons) granulated sugar
- ½ teaspoon (½ teaspoon) salt
- ½ cup (113.5 g) unsalted butter cold and cut into ½ inch cubes
- 3-5 tablespoons (44.36 ml) water ice cold, I usually use about 4 tablespoons
Instructions
- Cut the cold butter into ½ inch cubes. Place the butter back in the fridge while you measure the rest of your ingredients. Measure ¼ cup of cold water* in a bowl. Add a few ice cubes into the water and swirl the ice around. Place the bowl of water in the fridge until needed. You can also place the bowl in the freezer for a few minutes to ensure the water is very cold.
- Take out all the things you will need so that you don't have to go looking for them while making the dough. Take out a spatula, fork, pastry cutter (if using). and some plastic wrap.
- In a large mixing bowl, whisk to combine the flour, sugar and salt. Add the cubed butter. Use a spatula to toss the butter so it's fully coated with flour. Use the spatula to separate the butter cubes til they're all lightly coated.
- Next, use a pastry cutter to start to cut the butter into the dry ingredients. Use one hand to turn the bowl while the other hand uses the pastry cutter. Try not to aim for the same spot in the bowl each time and aim to slice through butter with each stroke. When the pastry blender clogs up with butter, clean it out with a butter knife. Use a spatula or your fork to toss the ingredients a little to make sure the butter stays coated with flour. Continue blending with the pastry cutter and turning the bowl til the largest pieces are no larger than peas.
- I recommend placing the bowl in the fridge to chill for 5 minutes at this point. This is optional, but it will help keep the ingredients cold.
- Next, make a well in the center of the bowl. Pour 2 tablespoons of the cold water (without the ice) into the well. Toss/stir the mixture with a fork to distribute the water. It should be clumpy with some dry spots at this point. Break up any sticky spots. Add 1-2 more tablespoons of water or cold vodka. Stir around with a fork til you don't see anymore pools of liquid anywhere.
- Use your hands to scoop as much of the mixture as possible then press it back down onto the rest of the mixture with your fingertips. Sprinkle or flick a tiny bit of water right onto any very dry spots if you notice them. Turn the bowl about a quarter turn and quickly repeat this process a few more times so that the mixture comes together. Knead only as much as needed to combine the dough. Stop kneading when the dough has come together and there are no longer any loose floury bits on the bottom of the bowl.
- Do not add any more water than you need. The dough will feel moist but not wet. (I typically use about ¼ cup of liquid or maybe a touch more).
- Pack the dough into a ball with your hands then place the dough on a sheet of plastic wrap. Gently pat it into a 1 inch thick disc. Seal any broken edges by pushing the edges of the dough gently on the counter. Wrap dough tightly with a double layer of plastic wrap.
- Set dough in the fridge for at least 30 minutes, preferably 1-2 hours or up to 2 days.
- When you’re ready to roll out the dough, turn the dough out on a floured surface. Flour both sides of the dough and your rolling pin. Start in the middle of the disc. Roll the dough out gently in all directions. Rotate the dough a quarter turn between each roll and flip it over ocasssionally to make sure it's not sticking to the counter. Continue flouring the counter and rolling pin as needed. Push any cracked areas together and keep rolling. Set a 9 inch pie plate upside down on top of the dough to check that it's rolled out big enough to allow a 2 inch overhang of dough all around the edge of the pie plate. The dough should be about ⅛ inch thick.
- Place your pie plate right next to the dough. Gently fold the dough in half then lift it and place it on your pie plate. Unfold the dough on top of the plate.
- Trim the edges of the dough with kitchen scissors so that it's about 2 inches on all edges. Adjust the dough so that it's fully covering the bottom of the pan and also touching the sides. To do this, lift the dough with one hand gently press it down into the side with the other hand. Do this around the whole dish then run your hand around the inside edge of the pan to make sure the dough is properly lined in the plate.
- Fold the excess dough under itself to create a thick crust edge. Lift the crust up at the edge, fold the excess dough under itself and towards the dish. Use your fingers to firmly press the dough so that the edge is flush with the pie plate. Chill the dough for another 5 minutes before crimping.
- Use your fingers to crimp the edges with your favorite style. You can also just press the tines of a fork against the edge dough to flatten against the rim of pie dish or for the simplest option, you can any crimping.
- Proceed with the pie by following your specific pie recipe’s instructions.
Notes
Nutrition
Please note that nutritional values are created by an online calculator and should only be used as an estimate.
Leave a Reply