
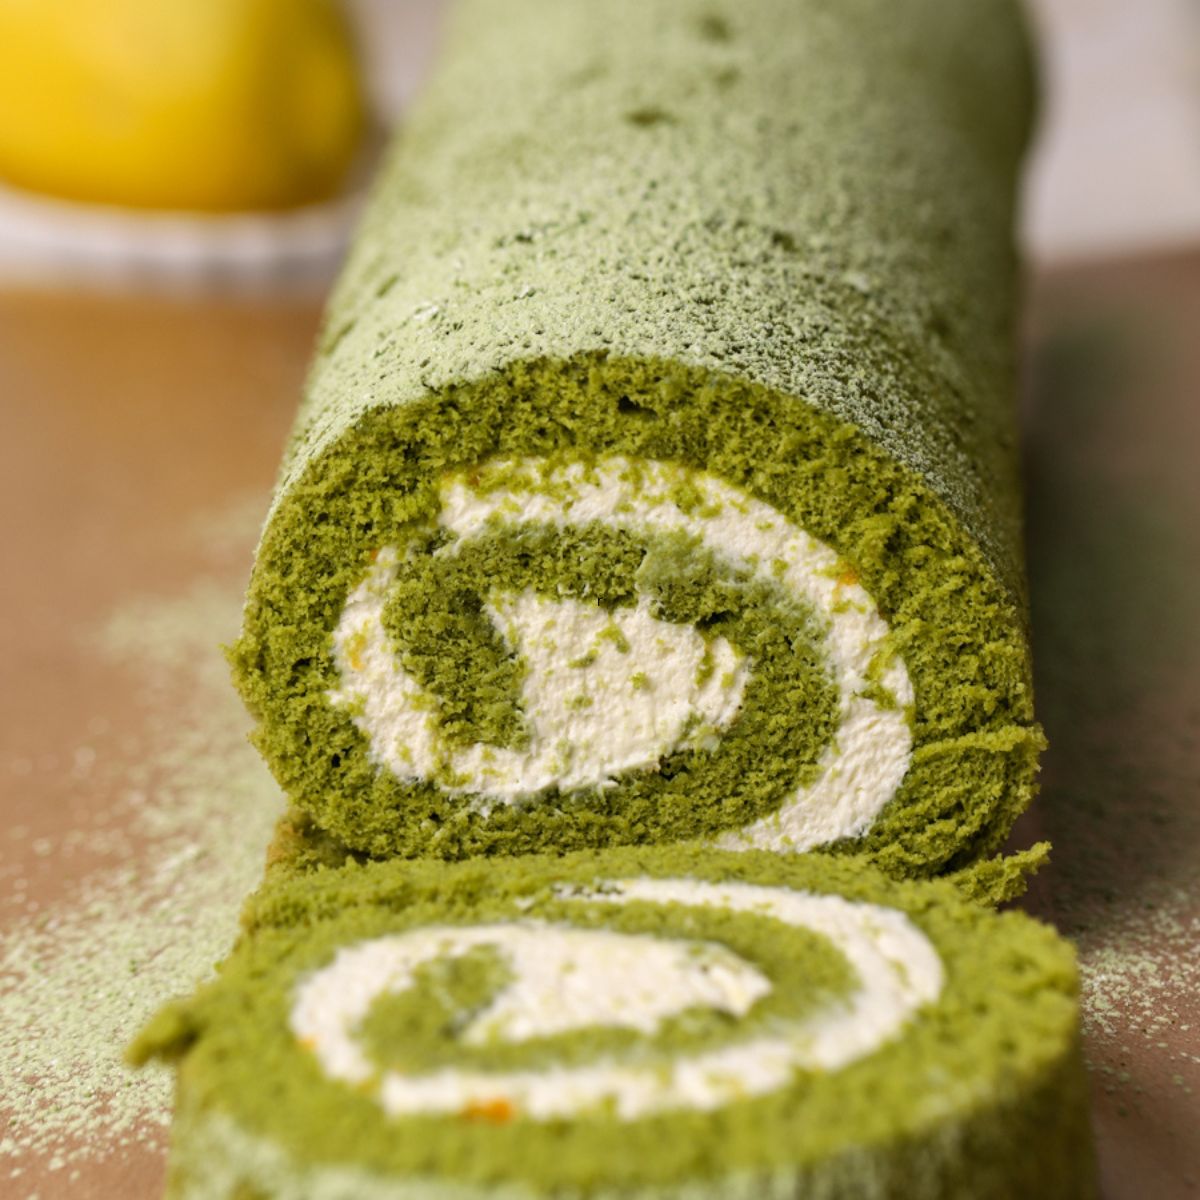
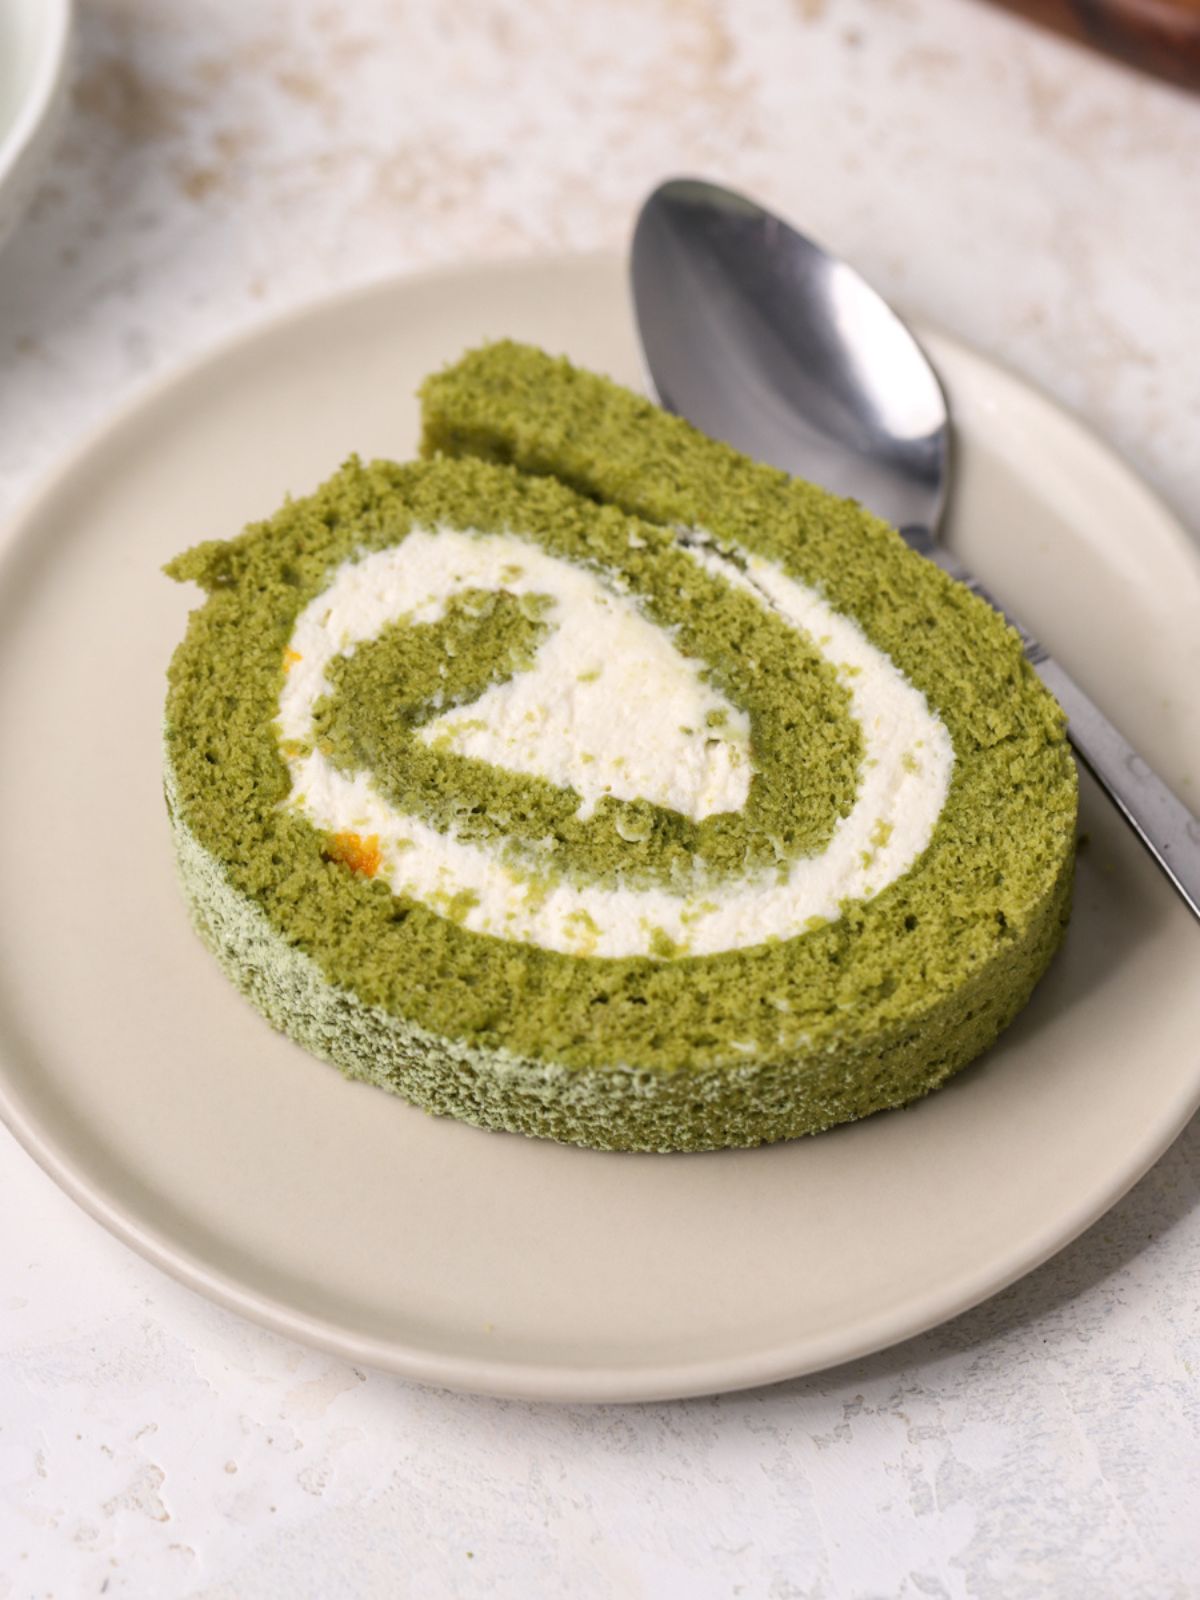
I’m all about simple cake recipes that still wow a crowd, and this easy matcha roll cake is a showstopper! The bright green matcha sponge is so soft and fluffy. It’s filled with a floral earl grey mascarpone whipped cream and a thin layer of apricot jam. Every bite is fresh and just a little fruity. It’s the perfect spring dessert!
Would you like to save this?
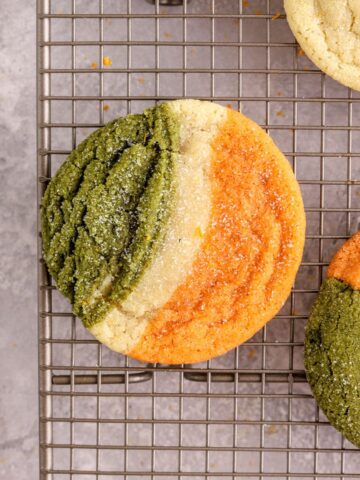
I truly love all things matcha flavored (have you tried my matcha sugar cookies??), and this matcha cake roll is my newest favorite.💚
Sponge cakes can seem intimidating, but this recipe for matcha sponge cake breaks it down to just a few simple steps. You just need to roll the sponge while it’s still hot to train it into shape, then unroll, fill and re-roll once cooled.
And this green tea matcha roll cake doesn’t have to look perfect. It should be rustic! You don’t need expert decorating skills to make this stunning dessert that you and your guests won’t stop talking about, just like this unique matcha affogato recipe!
Jump to:
- Why You’ll Love This Recipe This Matcha Roll Cake
- Matcha Roll Cake Ingredients (Including Ceremonial vs. Culinary Matcha)
- Substitutions and Variations
- How to Make Matcha Cake Roll (Step by Step, No Cracks)
- Step by Step Instructions
- Expert Baking Tips for a Perfect Matcha Roll Cake (Preventing Cracks and Cracking Myths)
- Recipe FAQs
- More Recipes You’ll Love
- Matcha Roll Cake
Why You’ll Love This Recipe This Matcha Roll Cake
- It’s stunning. That swirl of green sponge, white mascarpone, and apricot jam? Bakery-worthy, just like my pomegranate cake recipe! 🌀
- Matcha makes it unforgettable. That earthy, slightly sweet flavor is unlike most cakes.
- Perfect for spring. The delicate matcha and floral earl grey cream combo just feels like the season. For more spring desserts, try my blackberry lemon cake and mini carrot cake recipe!
- Make it ahead. Bake it the morning of or the night before — it actually gets better as it sits!
- Zero decorating skills needed. Serve as-is or with a dusting of powdered sugar.
Matcha Roll Cake Ingredients (Including Ceremonial vs. Culinary Matcha)
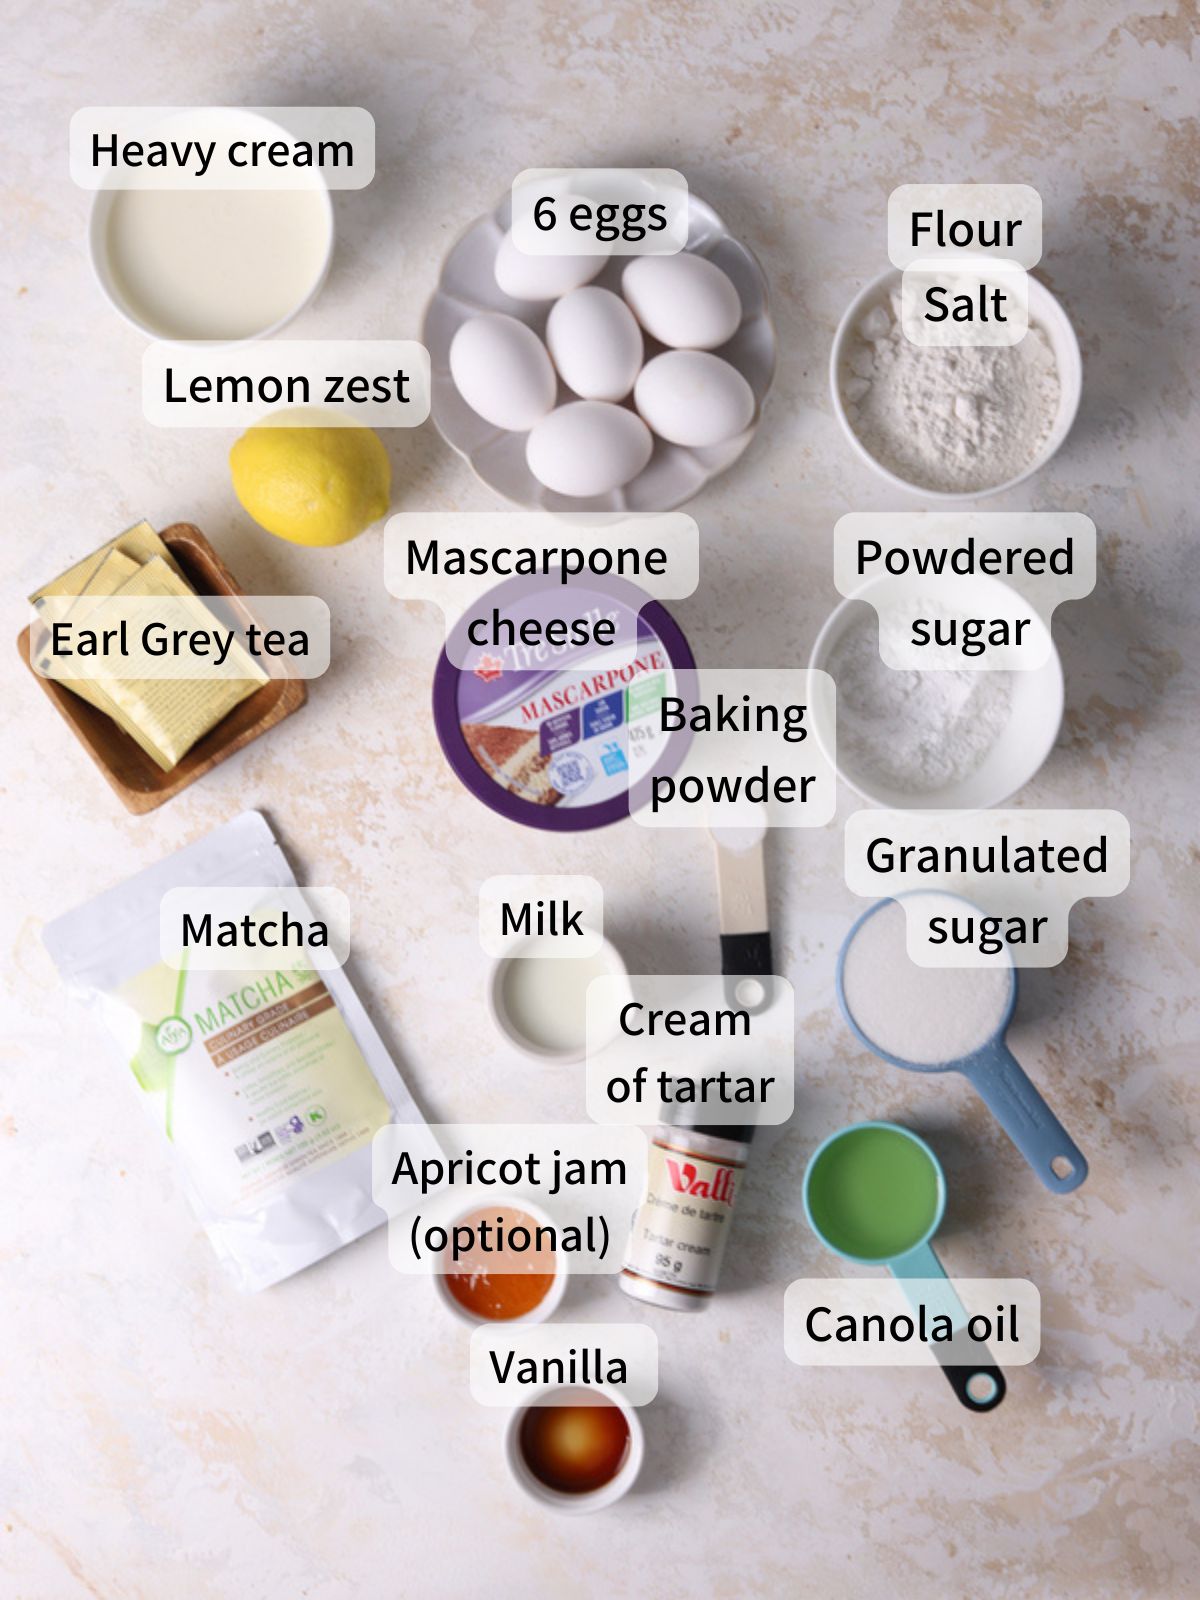
Here are some useful notes on some of the ingredients for this delicious matcha dessert.
- We’re sweetening the cake with granulated sugar and using powdered sugar to sweeten the filling.
- Cake flour gives the cake a nice tender texture.
- Matcha is a green tea leaf powder that gives the cake its vibrant green color and earthy flavor. You can find it online or in the the international foods section or tea and coffee section of most grocery stores. Matcha isn’t the cheapest ingredient, but we’re only using it in the sponge so you won’t need much! Quality matters so I’d go with ceremonial grade for the best color and flavor. I haven’t tried many brands of culinary matcha, so I recommend using this culinary grade matcha powder or going with ceremonial matcha for best results.
- Baking powder helps the cake rise and develop its spongy texture.
- Cream of tartar helps stabilize egg whites so the meringue whips up faster and holds its structure. If you bake often, you’ll find this useful in other recipes.
- Use 6 large separated eggs. It’s easiest to separate the eggs when they are cold. Then let them sit at room temperature for about 30 minutes before whipping. Room temperature egg whites whip into stiff peaks faster.
- Mascarpone cheese makes the filling thicker and more stable when you roll it. It’s similar to but richer than cream cheese. Keep it cold and grab it out of the fridge when you’re ready to use it. It adds a fresh, slightly sweet flavor to this cake, just like in my berry mascarpone ice cream recipe.
- Use heavy whipping cream for the filling. Make sure not to grab half and half or light cream.
- Steep 3 bags of earl grey tea in the cold heavy whipping cream. Keep the cream in the fridge while it steeps and whip it when it’s still cold. Earl grey tea adds a light hint of floral bergamot flavor. I just love it and it reminds me of the floral flavor of my hibiscus cookies recipe.
- The zest of half a lemon gives the filling even more fresh flavor! You can zest the other half of the lemon over the cake before serving if you like!
- We’re using a small amount of milk for the cake. Use any type you prefer.
- Use a neutral oil such as canola oil or avocado oil in the cake.
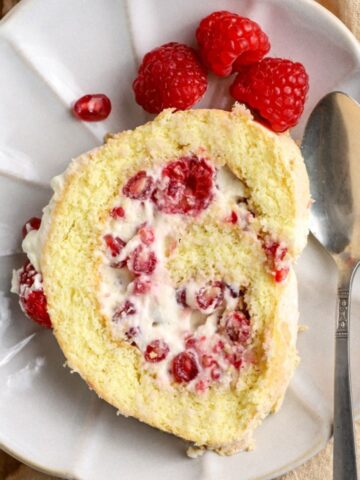
- I like to spread a thin layer of jam over the cooled sponge before adding the mascarpone whipped cream. It adds just a little something extra, but it’s optional! I use store-bought apricot jam. Orange or raspberry jam would also be nice.
See recipe card below for a full list of ingredients and measurements.
Substitutions and Variations
- Don’t have cake flour? Use all-purpose flour instead.
- Out of mascarpone cheese? I haven’t tried this, but I think you could substitute cream cheese. Make sure to use full fat, brick style cream cheese.
- Don’t have jam? You could also spread a thin layer of lemon curd in place of the jam layer.
- If you don’t have cream of tartar, you can leave it out or swap in 1 teaspoon of vinegar or lemon juice.
How to Make Matcha Cake Roll (Step by Step, No Cracks)
Quick Video Recap
Step by Step Instructions
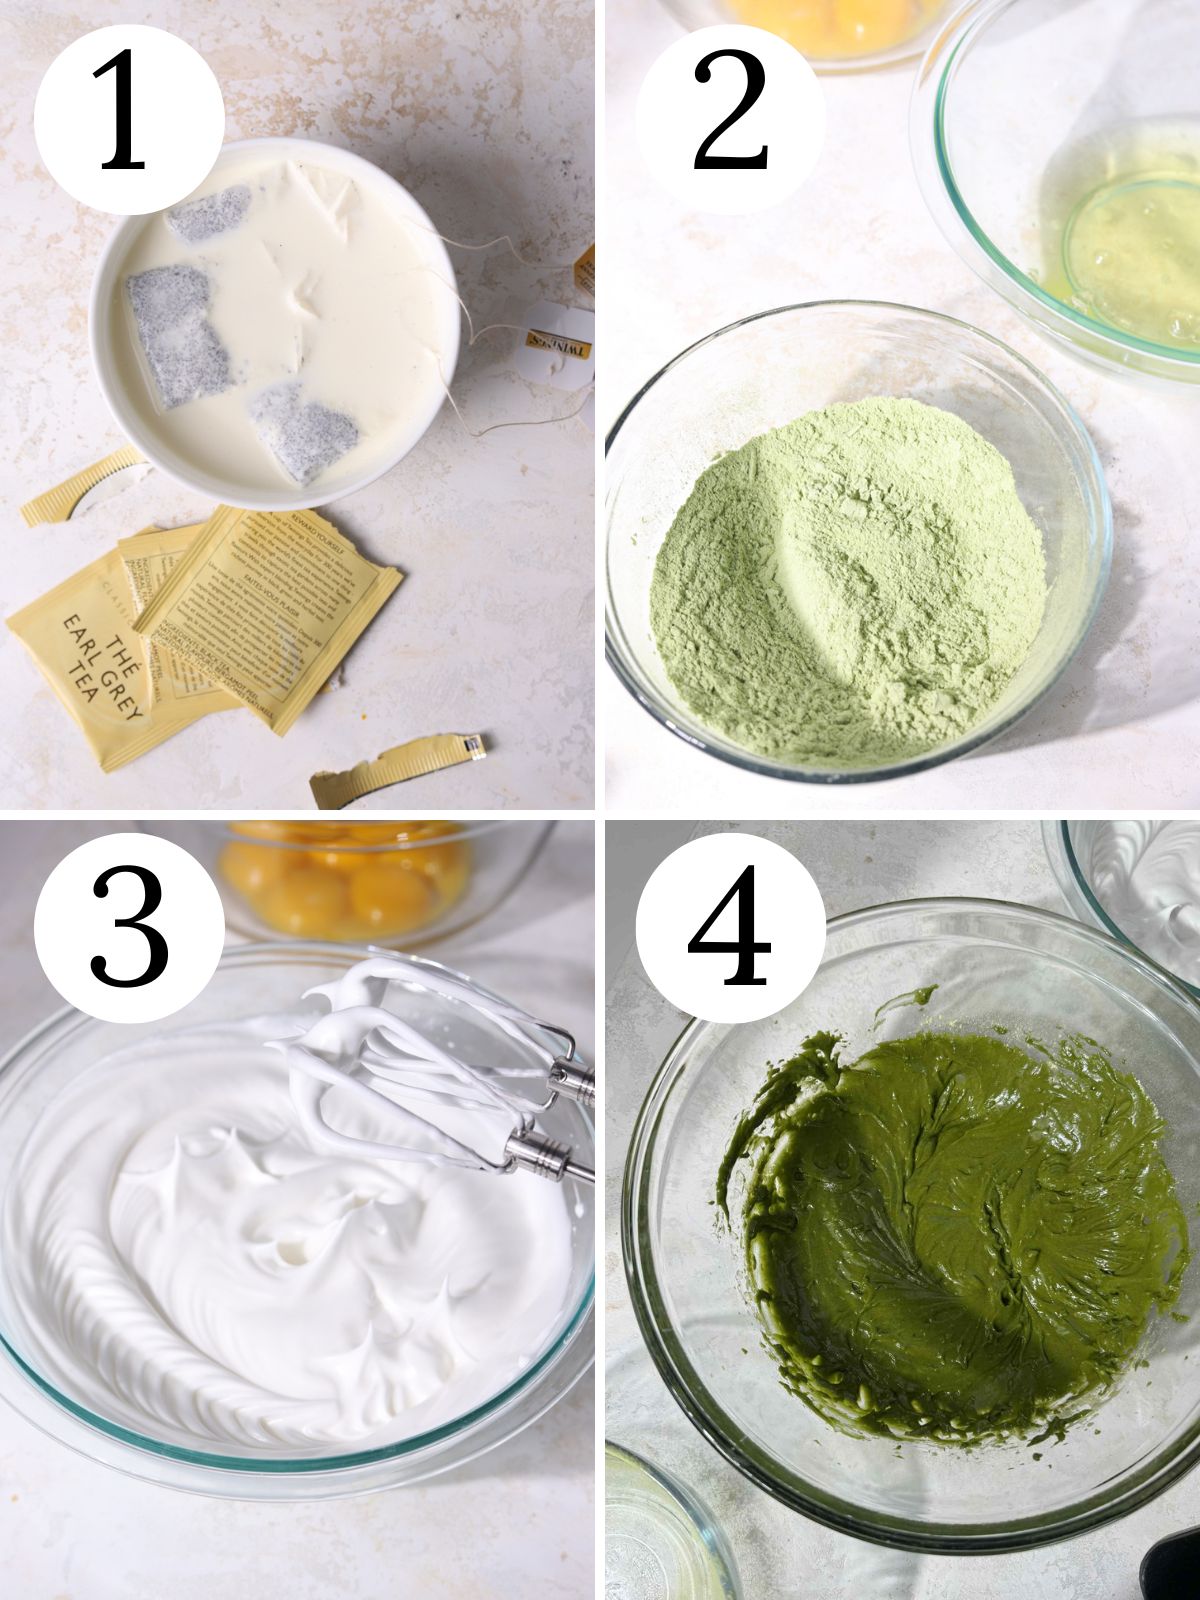
Step 1: Combine the heavy cream and Earl Grey tea bags in a bowl. Stir to immerse the bags in the cream then cover and refrigerate for up to 2 hours. While the cream steeps, make the cake.
Step 2: Whisk to combine the cake flour, baking powder, and salt. Sift in the matcha powder. Whisk again to combine completely. Set aside.
Step 3: Beat egg whites until frothy then mix in the cream of tartar. Gradually add ½ cup sugar. Increase speed to medium-high and beat until stiff, glossy peaks form, about 3–4 minutes. Set aside. Beat egg yolks and remaining ¼ cup (50g) sugar on medium-high until lightened in color and slightly thickened.
Step 4: Add milk, oil, and vanilla, mixing until just combined. Sift the flour mixture over the yolk batter and mix on low speed until smooth. Do not overmix. Use a spatula to fold about ⅓ of the egg white mixture into the egg yolk mixture. Scrape along the bottom of the bowl with the spatula. Fold in another third of the meringue then fold in the rest.
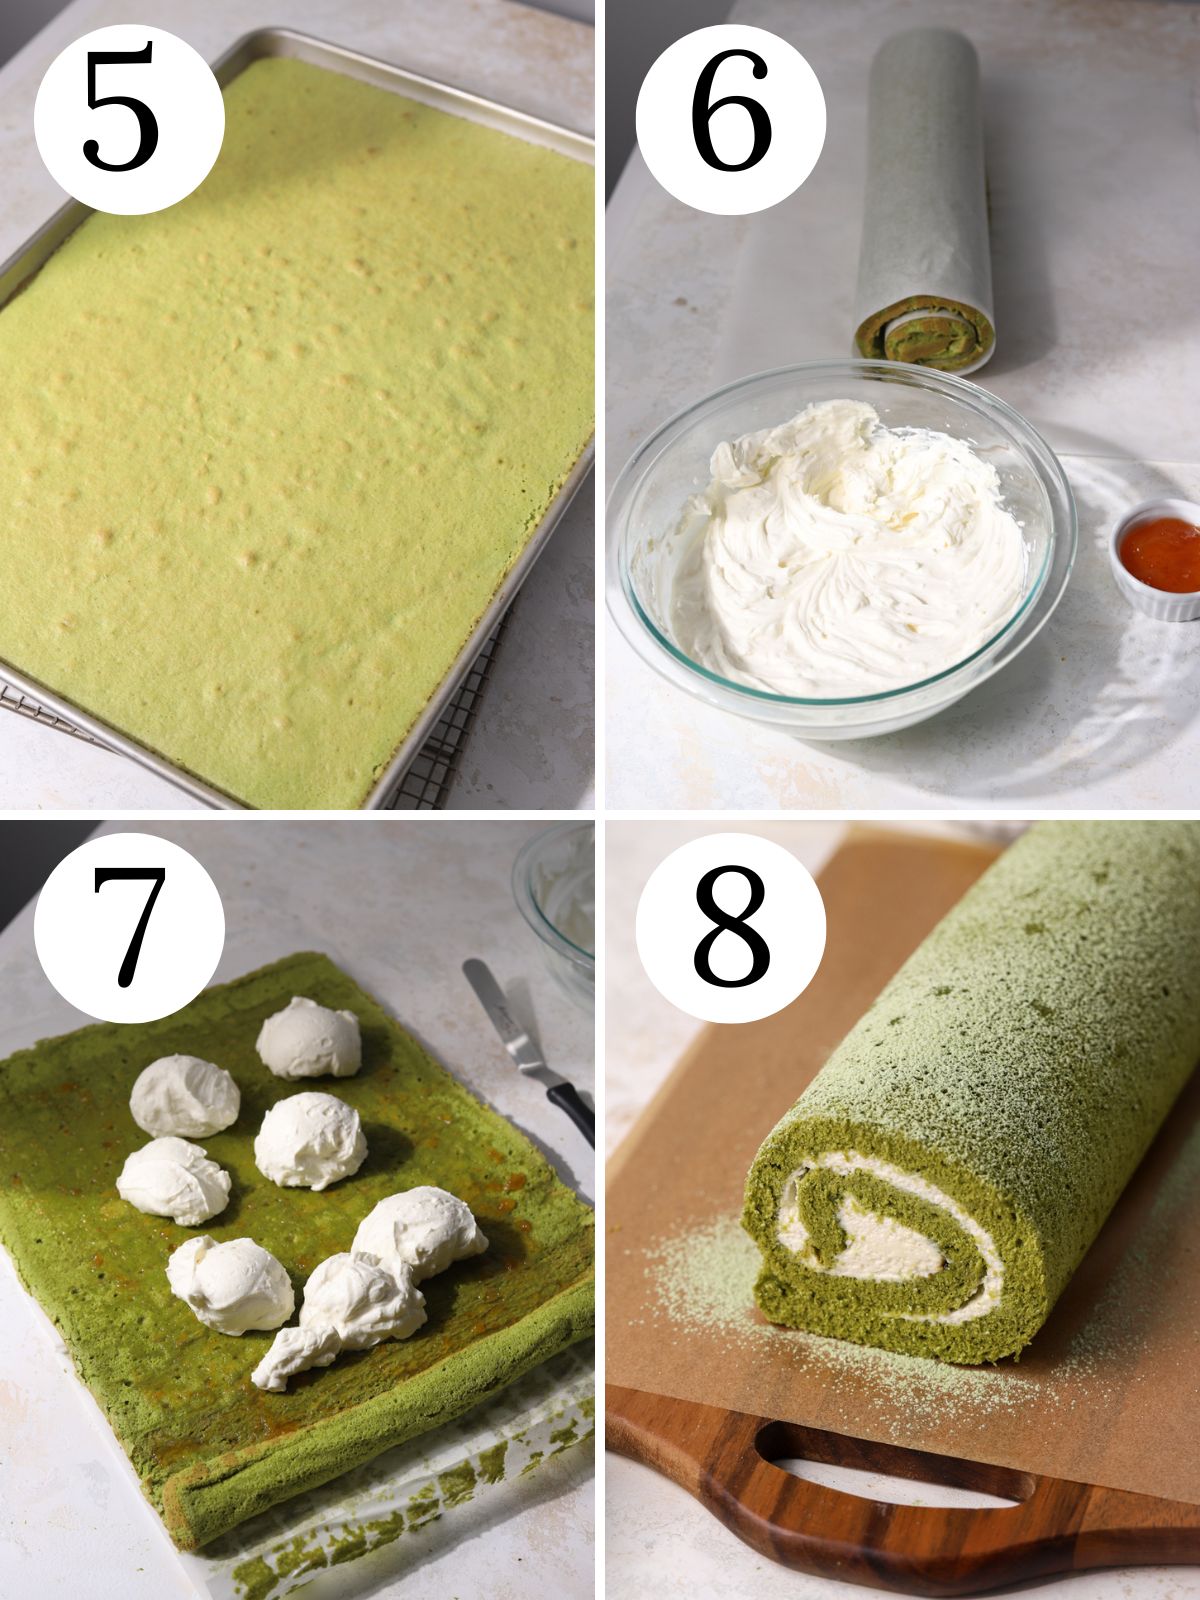
Step 5: Spread batter evenly in a lined baking sheet. Bake for 11-14 minutes until edges are lightly golden. (It’s a thin cake, so it will bake up quickly).
Step 6: While the cake bakes, set out a large sheet of parchment paper and dust it with powdered sugar. When the cake comes out of the oven, dust it lightly with powdered sugar. Run an offset spatula along the edges of the pan to loosen the cake. Carefully invert the pan onto parchment on your work surface. Lift away the pan. Peel the parchment off the bottom of the cake.
While the cake is still warm, use the sheet of parchment on your work surface to roll the cake up tightly from a short end into a cylinder. Let the cake cool completely.
Once the cake has cooled, prepare the filling. Remove the tea bags from the cream, pressing the bags to extract the tea. Whip the cream, powdered sugar and vanilla until you have soft peaks. Add the cold mascarpone and whip until stiff peaks form.
Step 7: Unroll the cooled cake, spread the jam, if using. Add the whipped cream (Leave the last inch at the end of the cake empty), roll back up (without the parchment paper). Place in an airtight container or wrap in plastic wrap. Chill for at least 30 minutes.
Step 8: Use a long serrated knife to cut about ½” off both ends of the cake. Enjoy as is or dust lightly with powdered sugar and/or matcha powder right before slicing and serving!
Expert Baking Tips for a Perfect Matcha Roll Cake (Preventing Cracks and Cracking Myths)
- Eggs are easiest to separate when they’re cold but, they are easier to whip up when they’re closer to room temperature. I recommend separating them in advance if you have the time so that the eggs can come to room temperature.
- Make sure your bowls are clean. Add the whites to a large clean mixing bowl and the yolks to another large clean mixing bowl. Let them come to room temperature before beating.
- Cold whipped cream whips best. Keep the cream and the mascarpone in the fridge til ready to use.
- Use good quality matcha. Matcha is the star here. Use good quality ceremonial matcha powder or culinary matcha for best flavor and color!
- Sift the matcha. Use any size sieve to sift the matcha into the dry ingredients. You can also use a sieve to dust powdered sugar and matcha over the cake before serving.
- Be patient when whipping the egg whites with some of the sugar. It can take at least 4–5 minutes. If it feels like it’s not working, just keep beating. It can take even longer if there’s humidity where you live.
- Make sure your bowl and beaters are completely clean and dry before whipping the egg whites. Even a small trace of fat will keep them from whipping up properly. To be on the safe side, you can wipe the bowl and beaters with a little lemon juice or white vinegar on a paper towel before you start.
- Make sure the cake has cooled completely before adding the filling. If the cake’s still warm, it’ll melt the filling!
- Wait to dust the cake with powdered sugar and/or matcha til right before serving.
Recipe FAQs
A standard half sheet pan (12×17 inches) works perfectly here and is the most common large rimmed baking sheet. You could also use a 12×17 pan. The cake will be a little thicker with fewer swirls when sliced.
Overbaking the cake is the most common mistake. A dry cake can crack when you roll it. Not rolling the cake while it’s still warm can also cause cracks. Using too much filling can make the cake hard to roll and cause it to split.
Ceremonial matcha has the best color and flavor, so it’s a great choice if you want a bright green cake and a smooth taste. Culinary matcha also works well for baking. Just choose a good-quality one so the flavor isn’t bitter and the color stays nice.
Store this cake in an airtight container in the fridge for up to 2 days. It’s best served the same day or the day after making it.
More Recipes You’ll Love

Did you try this recipe or any other recipe on my website? Please leave a 🌟star rating below and let me know how you enjoyed it in the 📝 comments below.
Don’t forget to tag me on Instagram, Facebook, and Pinterest!

Matcha Roll Cake
Ingredients
Matcha Cake
- ¾ cup (110 g) plus 2 tablespoons cake flour or use all-purpose flour
- 2 tablespoons (12 g) matcha powder ceremonial or good-quality culinary
- ¾ teaspoon baking powder
- ½ teaspoon cream of tartar optional
- ¼ teaspoon salt
- 6 large eggs room temperature, separated
- ¾ cup (150 g) granulated sugar divided (½ cup or 100 g for the egg whites and ¼ cup or 50 g for the yolks)
- 1 teaspoon vanilla extract
- ¼ cup (60 ml) canola oil or any neutral oil
- 3 tablespoons (45 ml) milk any type, room temperature
Earl Grey Mascarpone Whipped Cream
- ¾ cup (177 ml) heavy whipping cream cold
- 3 Earl Grey tea bags
- ⅓ cup (40 g) powdered sugar add an extra tablespoon or two, according to taste
- ½ teaspoon vanilla extract
- 1 tablespoon lemon zest the zest of about ½ a lemon (not using the lemon juice)
- 5 ounces (141 g) mascarpone cheese drained if needed cold
Jam Layer (optional)
- 3 tablespoons (60 g) apricot jam optional
Decoration
- 1 tablespoon (8 g) powdered sugar
- ½ teaspoon matcha powder
- lemon zest optional, zested overtop before serving
Instructions
Matcha Cake
- Steep the cream: The first step in this recipe is to begin cold steeping the tea in the cream. In a medium sized bowl, combine the heavy cream and 3 earl grey tea bags. Stir gently and make sure the tea bags are immersed in the cream. Cover and refrigerate for up to 2 hours. I recommend steeping it for the full 2 hours. The longer it steeps the stronger the flavor. You can do this at the start and make the cake and let it cool while the cream steeps.
- Make the cake: Preheat oven to 350℉. Line a 12×17 inch rimmed baking sheet with parchment paper. Trim the parchment paper to fit, if needed.
- In a medium sized bowl, whisk to combine the cake flour, baking powder and salt. Use a small sieve to sift in the matcha powder. Whisk mixture to combine completely then set aside.
- Separate the eggs into two large bowls. Tip: make sure your bowl for beating the egg whites is clean, with no trace of oil. You can wipe the bowl with a paper towel and a bit of lemon juice or vinegar before adding the egg whites. Also, be careful not to get any yolk into the whites. I like to break the white into a small bowl then transfer to the large bowl one at a time.
- Beat egg whites on medium speed until frothy, about 1 minute. Mix in the cream of tartar (or lemon juice/vinegar). Slowly add ½ cup (100g) sugar a little at a time. Increase speed to medium-high and beat until stiff, glossy peaks form, about 3–4 minutes. The meringue should be smooth and shiny and hold a firm peak. Set aside.
- Using the same beaters without washing, beat egg yolks and remaining ¼ cup (50g) sugar on medium-high until lightened in color and slightly thickened, about 2 minutes.
- Add milk, oil, and vanilla, mixing until just combined.
- Use a fine mesh sieve to sift the dry ingredients over the yolk batter. Use a silicone spatula to fold the batter together. Do not over-mix.
- Use a spatula to fold about ⅓ of the egg white mixture into the egg yolk mixture. (This should help to loosen up the egg yolk mixture). Scrape along the bottom and sides of the bowl with the spatula. Fold another ⅓ of the meringue into the yolk mixture then fold in the rest of the meringue until just combined and no streaks remain. Scrape the bottom of the bowl once or twice with the spatula if needed to be sure the batter isn't sticking. Make sure not to overmix.
- Pour the batter into the lined baking sheet. Quickly spread it evenly with an offset spatula. Bake for 12–14 minutes or until the edges turn lightly golden and the top of the cake lightly springs back when lightly touched with your finger. Do not over-bake.
- While the cake bakes, set out a large sheet of parchment paper on your work surface and use a fine sieve to dust it with powdered sugar. As soon as the cake comes out of the oven, dust the top of the cake lightly with powdered sugar. Run an offset spatula along the edges of the pan to loosen the cake. Using oven mitts, carefully invert the pan onto the powdered sugar parchment paper on your work surface. Lift away the pan and carefully peel away the parchment from the bottom of the cake and discard it.
- While the cake is still warm, gently but tightly roll it up (with the parchment paper) from a short end using the parchment to guide the roll. Set it seam side down. Let the cake cool completely in this rolled shape for about 1 hour. (Rolling while warm trains the cake into shape and prevents cracking later).
Earl Grey Mascarpone Whipped Cream
- Once the cake has nearly cooled, make the whipped cream. Take the steeping cream out of the fridge. Press the tea bags well to extract maximum flavor. Discard the tea bags. In a large bowl whip the earl grey cream with the powdered sugar, vanilla, and lemon zest on medium-high speed until soft peaks form, about 2–3 minutes. Add the cold mascarpone and whip on medium-high until stiff peaks form, about 1 minute more. Don't overwhip once the mascarpone is in.
Assembly
- Unroll the cooled cake. Spread the apricot jam in a very thin, even layer directly on the sponge, leaving a 1 inch border on one of the shorter ends. Spread all of the mascarpone cream on top of the jam, again leaving a 1-inch border on the end. Roll the cake back up starting at the shorter end, this time without the parchment paper. Wrap loosely in plastic wrap, set seam-side down on a baking sheet, and refrigerate for at least 30 minutes.
Decorating and Serving
- Unwrap the chilled cake. Use a long serrated knife to cut about ½" off both ends of the cake. Set the cake seam-side down on a serving board. In a small bowl mix together 1 tbsp powdered sugar and ½ tsp matcha, then use a fine sieve to dust the mixture lightly and evenly over the top of the cake. Zest the remaining lemon over the cake if you like. Slice with a serrated knife using a slow, gentle sawing motion, wiping the blade clean with a damp cloth between each cut. Enjoy!
Video
Notes
Nutrition
Please note that nutritional values are created by an online calculator and should only be used as an estimate.
Linda
Describing this cake as delicious! is an understatement.
Thanks for another amazing recipe
Natalie Ward
Wow thank you, Linda! I’m thrilled you enjoyed it and thanks for making this cake! Have a great day. -Natalie
Martin
I always wanted to bake a roll cake. I found this matcha roll recipe and decided to give it a try. What an awesome cake it turned out to be. Easy detailed steps and so fresh tasting and delicious! Will make this again.
Natalie Ward
Thanks so much for making this recipe and sharing your experience, Martin! I’m thrilled you enjoyed it!
Bassey
This is definitely another recipe i would love to try! another excellent creation.
Natalie Ward
Thank you Bassey!
Aubrey
This little matcha cake roll was awesome! A perfect treat for St. Patrick’s day. I loved how it was so light and creamy. Another home run, Natalie 🙂
PS, Is it wrong to want to eat the whole cake?
Natalie Ward
Hahaha not wrong at all, Aubrey! So happy you enjoyed this matcha cake. Thanks for your comment and awesome feedback 🙂