
These easy peanut butter balls are buttery and delicious! Enjoy as is or dip them in chocolate and (optional) butterscotch. They are made with 5 simple ingredients and are the perfect no bake treat for Christmas cookie exchanges!

Would you like to save this?
Old fashion peanut butter balls are a tradition around the holidays! They are the perfect peanut butter and chocolate no bake treat. I think they taste even better than better than peanut butter cups.
This no bake peanut butter balls recipe can be made with just 5 ingredients or less. They’re the perfect easy treat for holiday cookie boxes!
For more festive holiday treats, make these chocolate blossoms cookies, brownies with peppermint bark, and Christmas blondies recipe!
Jump to:
Why We Love This Recipe
- You only need 5 simple ingredients to make this chocolate and peanut butter balls recipe.
- They’re a no-bake recipe just like my M&M rice krispie treats!
- You don’t need a candy thermometer or any special tools.
- These butterscotch chocolate covered peanut butter balls have thick exteriors and soft, peanut butter middles!
- They’re customizable! Enjoy them plain or dipped in chocolate. Use milk chocolate, semi-sweet, or dark. Add butterscotch too, if you like. Chocolate fans will also love these chocolate chocolate chip bars!
- Peanut butter chocolate dipped balls last for up to 2 weeks in the fridge. They are also freezer-friendly!
Ingredients

Below are useful notes about some of the ingredients for these choc covered peanut butter truffles.
- Peanut butter: Use creamy or chunky peanut butter. I use peanut butter brands like Jiff or Skippy for this recipe. I don’t recommend using natural peanut butter. If you’re a big peanut butter fan, try my no bake peanut butter chocolate pie!
- Butter: Use salted or unsalted butter. It doesn’t need to be room temperature since we are melting it.
- Chocolate: Use bars of baking chocolate, candy melts or chocolate chips. My grandmother always used chocolate chips. They don’t melt as well as the baking chocolate bars or candy melts, but her peanut butter balls always turned out amazing!
- Butterscotch chips: My grandmother always added a bag of butterscotch chips to her chocolate coating. I love the flavor it adds. You can leave butterscotch out and just use more chocolate in its place. For another yummy butterscotch treat, be sure to try my butterscotch cupcakes!
Please see recipe card below for full list of ingredients and their measurements.
Substitutions & Variations
- Instead of semi-sweet chocolate, try dark chocolate!
- Milk chocolate works too. If you use milk chocolate, I would leave out the butterscotch chips because they’d be too sweet.
- Top the peanut butter balls with red and green sprinkles! Do this right after coating them with chocolate so that the sprinkles stick.
How to Make Peanut Butter Balls
Quick Video Recap
Instructions


Step 1: (Photo 1 above) Melt the butter and peanut butter together in the microwave.
Step 2: (Photo 2 above) Mix in the powdered sugar by hand or with an electric mixer.


Step 3: (Photo 3 above) Shape into 1 inch balls and place on a baking sheet. Chill for at least 30 minutes.
Step 4: (Photo 4 above) Next, melt the chocolate and butterscotch. Microwave at 30 second intervals at 50% power. Stir in between until melted.

Step 5: (Photo 5 above) Use two forks to dip peanut butter balls into melted chocolate. Tap off excess chocolate and place them on a baking sheet. Chill at least 30 minutes.
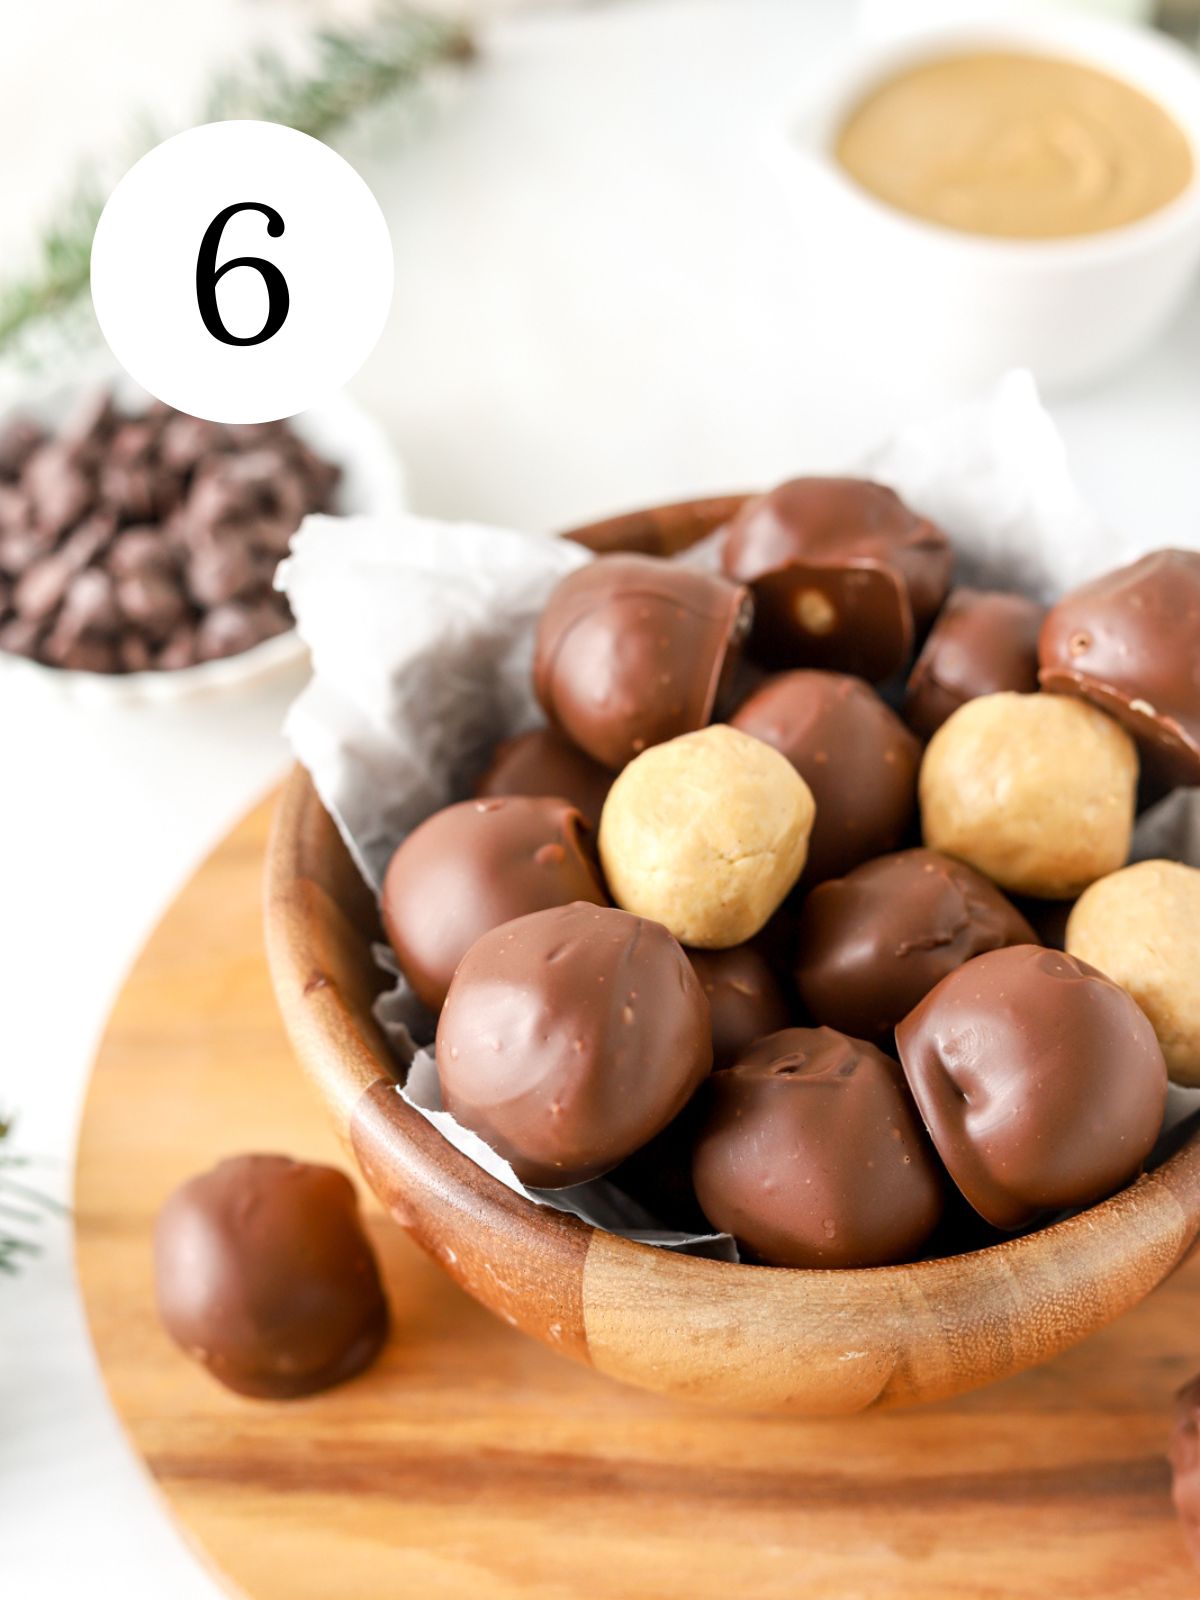
Step 6: (Photo 6 above) Once chocolate has set, enjoy!
Expert Tips
Make sure to use the right amount of powdered sugar. Avoid using too much or too little.
Make sure to chill the peanut butter balls. They will hold their shape better when they are cold. They will be easier to coat in chocolate if they are cold.
I find using two forks works best for dipping peanut butter balls in chocolate. Let excess chocolate fall through the tines of the forks before you set it on the baking sheet.
Recipe FAQs
Use a creamy or crunchy peanut butter such as Jif or Skippy. Regular peanut butter will give the peanut butter balls a creamier texture than natural peanut butter.
Yes! Bars of baking chocolate or candy melts melt more evenly. They coat the peanut butter balls more evenly than chocolate chips, but chocolate chips work. My grandmother always used chocolate chips and butterscotch chips and her peanut butter balls turned out amazing.
Store peanut butter balls in an airtight container in the fridge for up to 2 weeks.
Yes! Freeze in a freezer-safe storage bag for up to 3 months.

Did you try this recipe or any other recipe on my website? Please leave a 🌟 star rating and 📝 comment below.
Don’t forget to tag me on Instagram, Facebook, and Pinterest!

Peanut Butter Balls
Ingredients
- 2 cups (516 g) peanut butter such as Jif or Skippy
- ½ cup (113.5 g) butter salted or unsalted
- 4 ½ cups (540 g) powdered sugar sifted
- 11 ounces (340.2 g) butterscotch chips optional, add more chocolate chips as a substitute
- 12 ounces (340.2 g) chocolate chips use semi-sweet or dark, use chocolate chips, candy melts or bars of baking chocolate
Instructions
- Melt the peanut butter and butter in a saucepan over low heat. Remove from heat. Allow to cool slightly. (You can also melt peanut butter and butter in a microwave).
- Pour the peanut butter and butter mixture into a large bowl. Add the powdered sugar and beat with an electric mixer on medium speed until well combined.
- Form into 1" balls (about 15 g or .5 ounce each). Set the balls on a baking sheet lined with parchment paper. Chill in the fridge until firm, about 30 minutes.
- After 30 minutes, melt the chocolate. Place chocolate and butterscotch chips in a microwave safe bowl. Microwave at 50% power in 30 second increments. Stir well after each increment.
- Dip each peanut butter ball in the melted chocolate one at a time. Coat evenly. Use two forks to help tap off excess chocolate. Place balls back on the baking sheet. Chill in the fridge at least 30 minutes to set chocolate.
Video
Notes
Nutrition
Please note that nutritional values are created by an online calculator and should only be used as an estimate.
emily
I’m so sorry I accidentally looked at a name and I had written it, again I’m really sorry I didn’t mean Bianca 😭😭
Natalie
Hehe no worries!
emily
Hey Bianca! I was wondering what you’re ratio is on the Powdered sugar, did you use a cup to measure it? if so, which one did you use!! I rlly love your page and you’re recipes by the way they’re rlly creative 💕💕
Natalie
Hi Emily! Thank you so much for your kind words! I’m so happy you love my recipes 🙂 Good question-so I use a scale for most of my recipes, but for this recipe I use my kitchenAid measuring cup. I got this recipe from my grandmother and I know she used measuring cups as opposed to a scale too, so that’s been the way I make these. Please let me know if you have any other questions and hope you enjoy these 🙂
emily
Ahh thank you! I’m definitely going to make them tomorrow! and Yess I have one more question, I don’t have an Electric Mixer yet and I’ve been using a metal whisk to mix everything I’ve been baking so far, do you think it’ll work out the same without an electrical mixer?
Natalie
My pleasure! You can definitely make these without an electric mixer. You might want to use a spatula or a large spoon since a whisk might clump up a little, but if a metal whisk is all you have, that can work! 🙂
Bianca
I’m definitely going to try this one.
Natalie
Hi Bianca, I hope you enjoy them! 🙂