
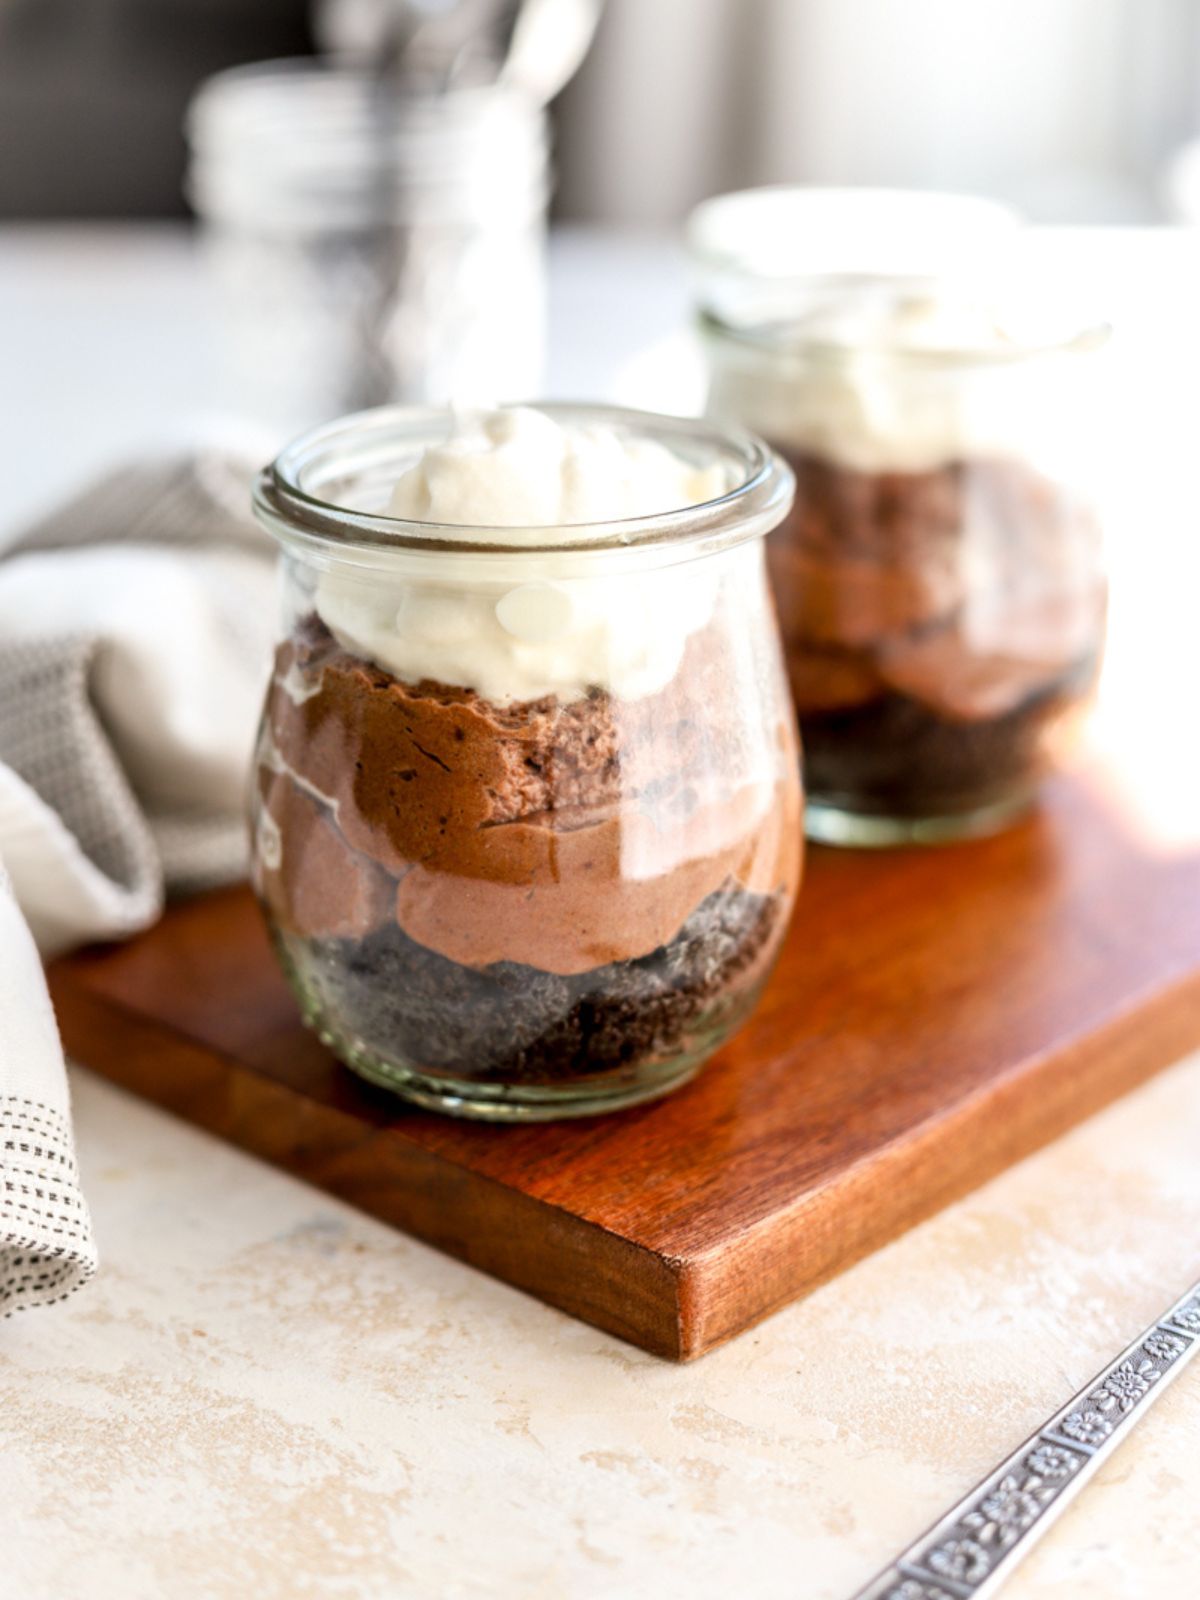
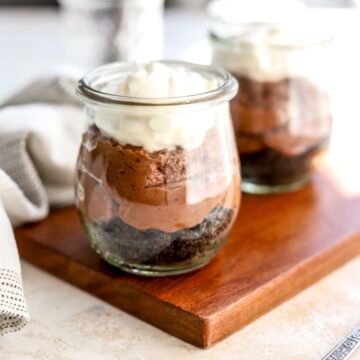
I love having these mini chocolate pies ready in the fridge when it’s time for dessert! Each one has a brown butter Oreo crust, creamy chocolate filling, and homemade whipped cream — all served in their own little jar. No oven needed and they’re so easy to make ahead!
Check out all my no-bake desserts for more easy ideas!

Would you like to save this?
I adapted this recipe for chocolate mini pies from my no-bake chocolate mousse bars recipe to make it in individual servings! Serve them in anything- ramekins, little jars or even coffee mugs all work. They’re so easy to share, no slicing required!
Everyone can customize their own toppings. My husband always goes for dark chocolate shavings to make his extra chocolatey. I usually choose toffee bits or chopped nuts for some crunch.
For more decadent chocolate desserts, try my chocolate mini cheesecakes and peanut butter chocolate pie.
Jump to:
Why We Love This Recipe
- Each layer of these mini chocolate pies is made with only a few ingredients!
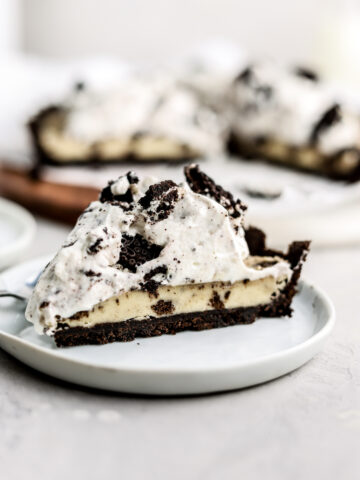
- The Oreo cookie crust adds a crunchy texture and extra chocolate flavor! For more decadent chocolate treats, try my fudge chocolate cupcakes, easy edible brownie batter recipe.
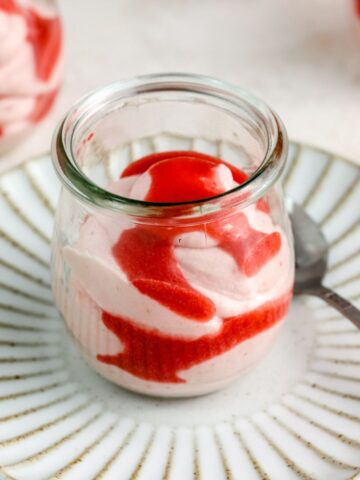
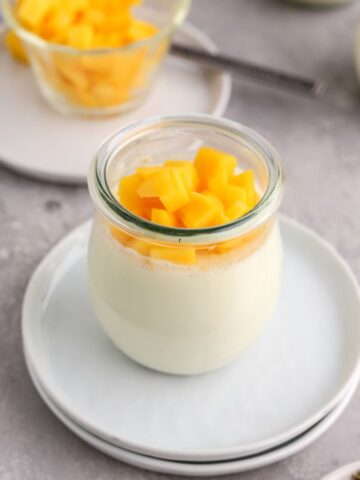
- These mini pies are so fun to eat and share. Everyone loves mini, individual treats like this mango panna cotta and strawberry mousse!
- This dessert comes together with no baking. You can also make it in ahead of time. Just store it in the fridge until you’re ready to serve it.
Ingredients

Here are some useful notes on some of the ingredients.
- Oreo Cookies: Use the cookies (middle and all) for the crust. I do not recommend Double Stuf Oreos. They have too much cream in them.
- Butter: Use melted or browned salted or unsalted butter for the crust. Browning butter only takes a few extra minutes. Brown butter is butter that is melted and cooked gently. It adds a toasty, nutty flavor just like in my pistachio and ricotta cake. Allow butter to cool slightly before mixing it into the Oreo crumbs.
- Heavy Whipping Cream- We’re using heavy cream for both the chocolate filling and whipped cream topping. Heavy cream makes the filling rich and fluffy! It has a higher fat content and whips to stiff peaks better.
- Semi-sweet chocolate- I use semi-sweet chocolate. You can also use dark, milk or a combination of different types. Use chopped chocolate or chocolate chips. For more yummy chocolate recipes, try my chocolate peppermint crinkle cookies and flourless chocolate cake.
See recipe card below for a full list of ingredients and measurements.
Substitutions & Variations
- Swap in store bought pudding mix for the filling.
- Use store bought whipped cream in place of homemade.
- Grab a box Oreo crumbs in the baking aisle. Simply stir them with melted butter for the crust.
- Customize your toppings! Top with strawberries, blueberries, blackberries, raspberries, pomegranate arils, or chopped nuts. If you love chocolate and fruit together, try my chocolate blueberry cake and raspberry and chocolate cake!
- Big fan of chocolate?! Top with chocolate sprinkles, crushed Oreos or shaved chocolate, or chocolate curls! For chocolate curls, use a vegetable peeler to shave the side of a bar of white or dark chocolate.
How to Make Mini Chocolate Cream Pies
Quick Video Recap
Step By Step Instructions

Step 1: Crush the Oreos in a food processor until they’re fine crumbs. Add the slightly cooled melted butter or brown butter and pulse to combine. Divide the mixture between three mugs, glasses or jars.
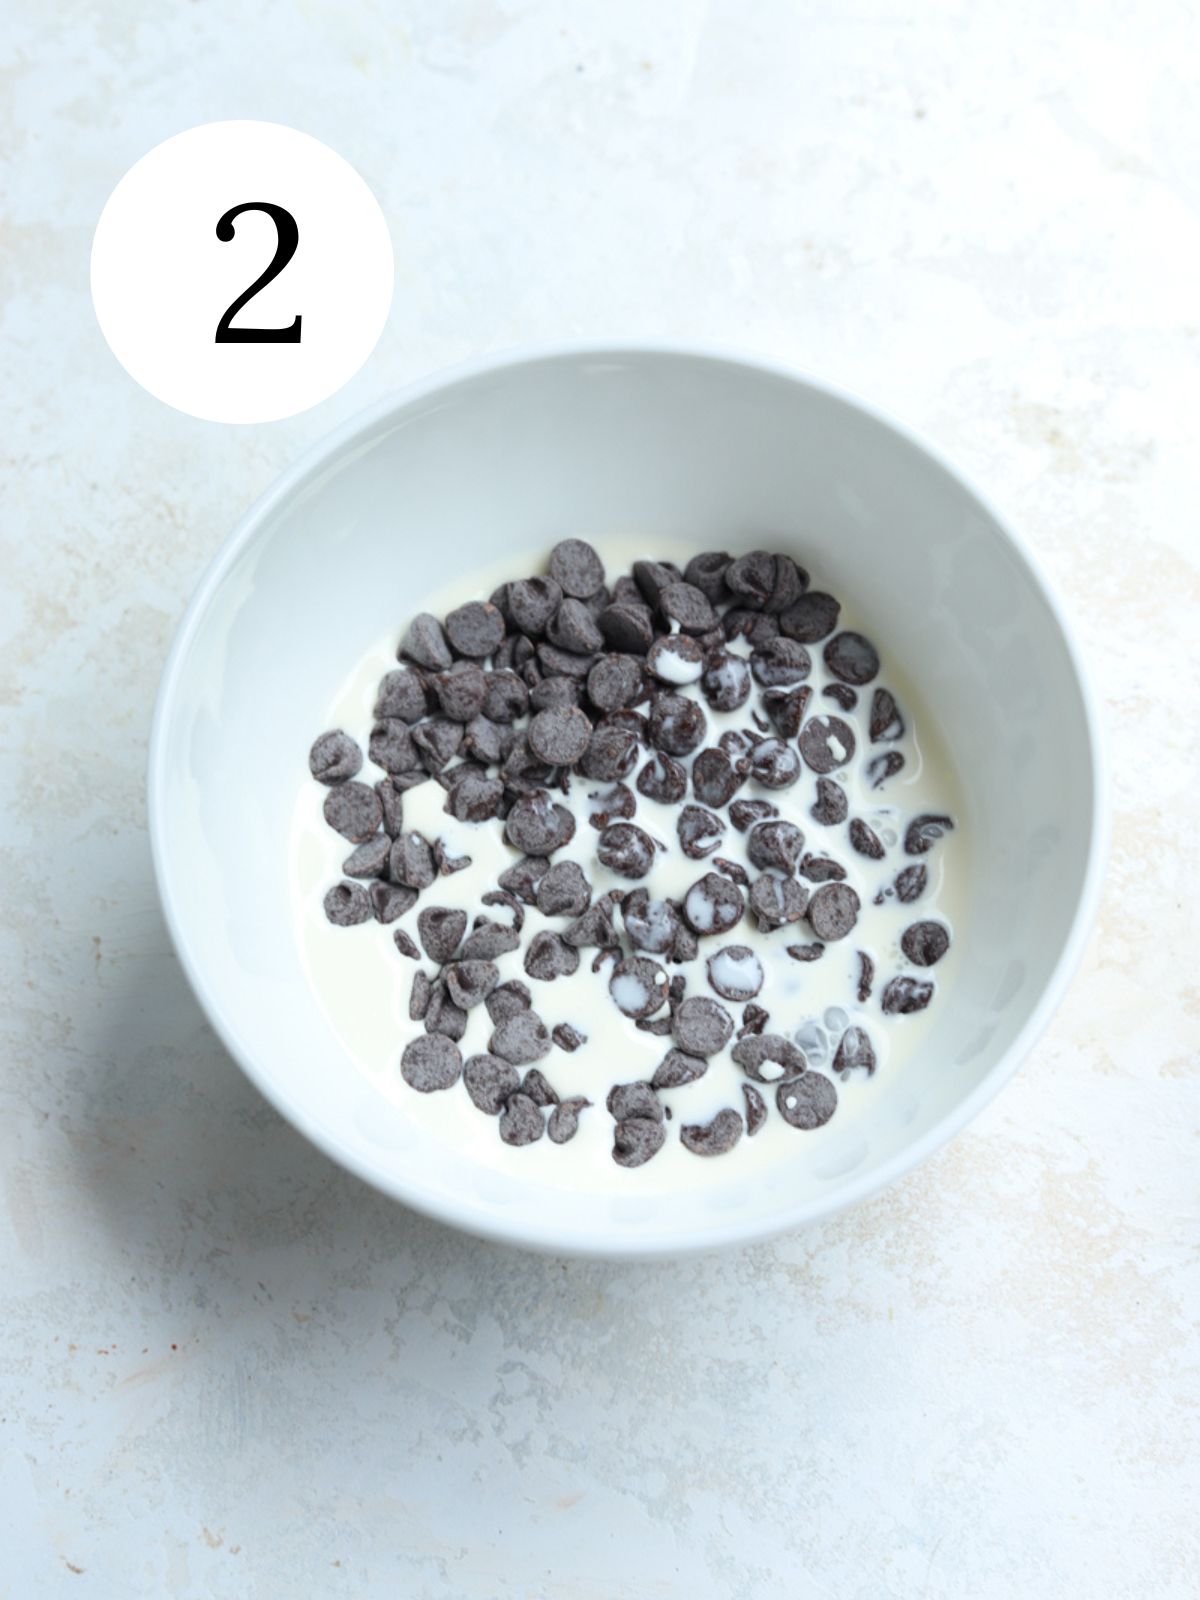
Step 2: Combine the chocolate and heavy cream in a bowl. Microwave for 15 seconds. Stir well then microwave again for 10 seconds. Stir until chocolate has melted. Allow chocolate and cream mixture to cool for about 15 minutes.
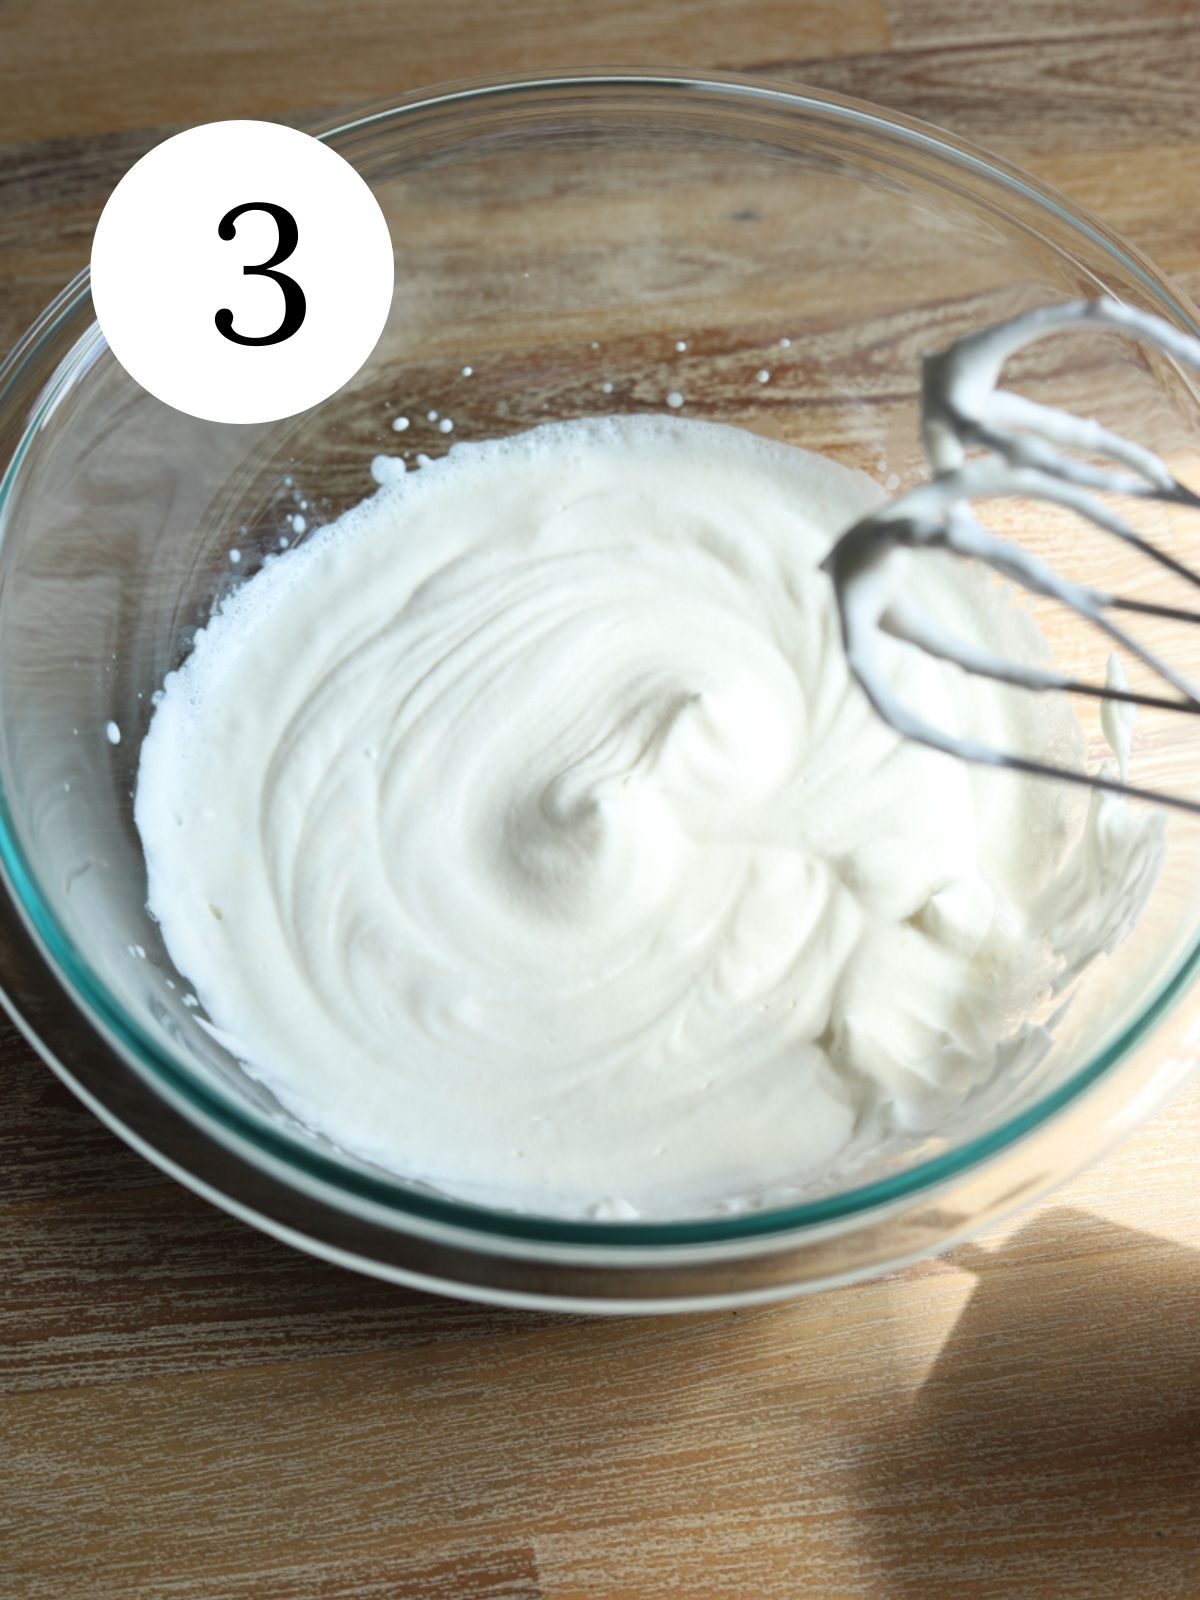
Step 3: Beat the cold heavy cream to stiff peaks.
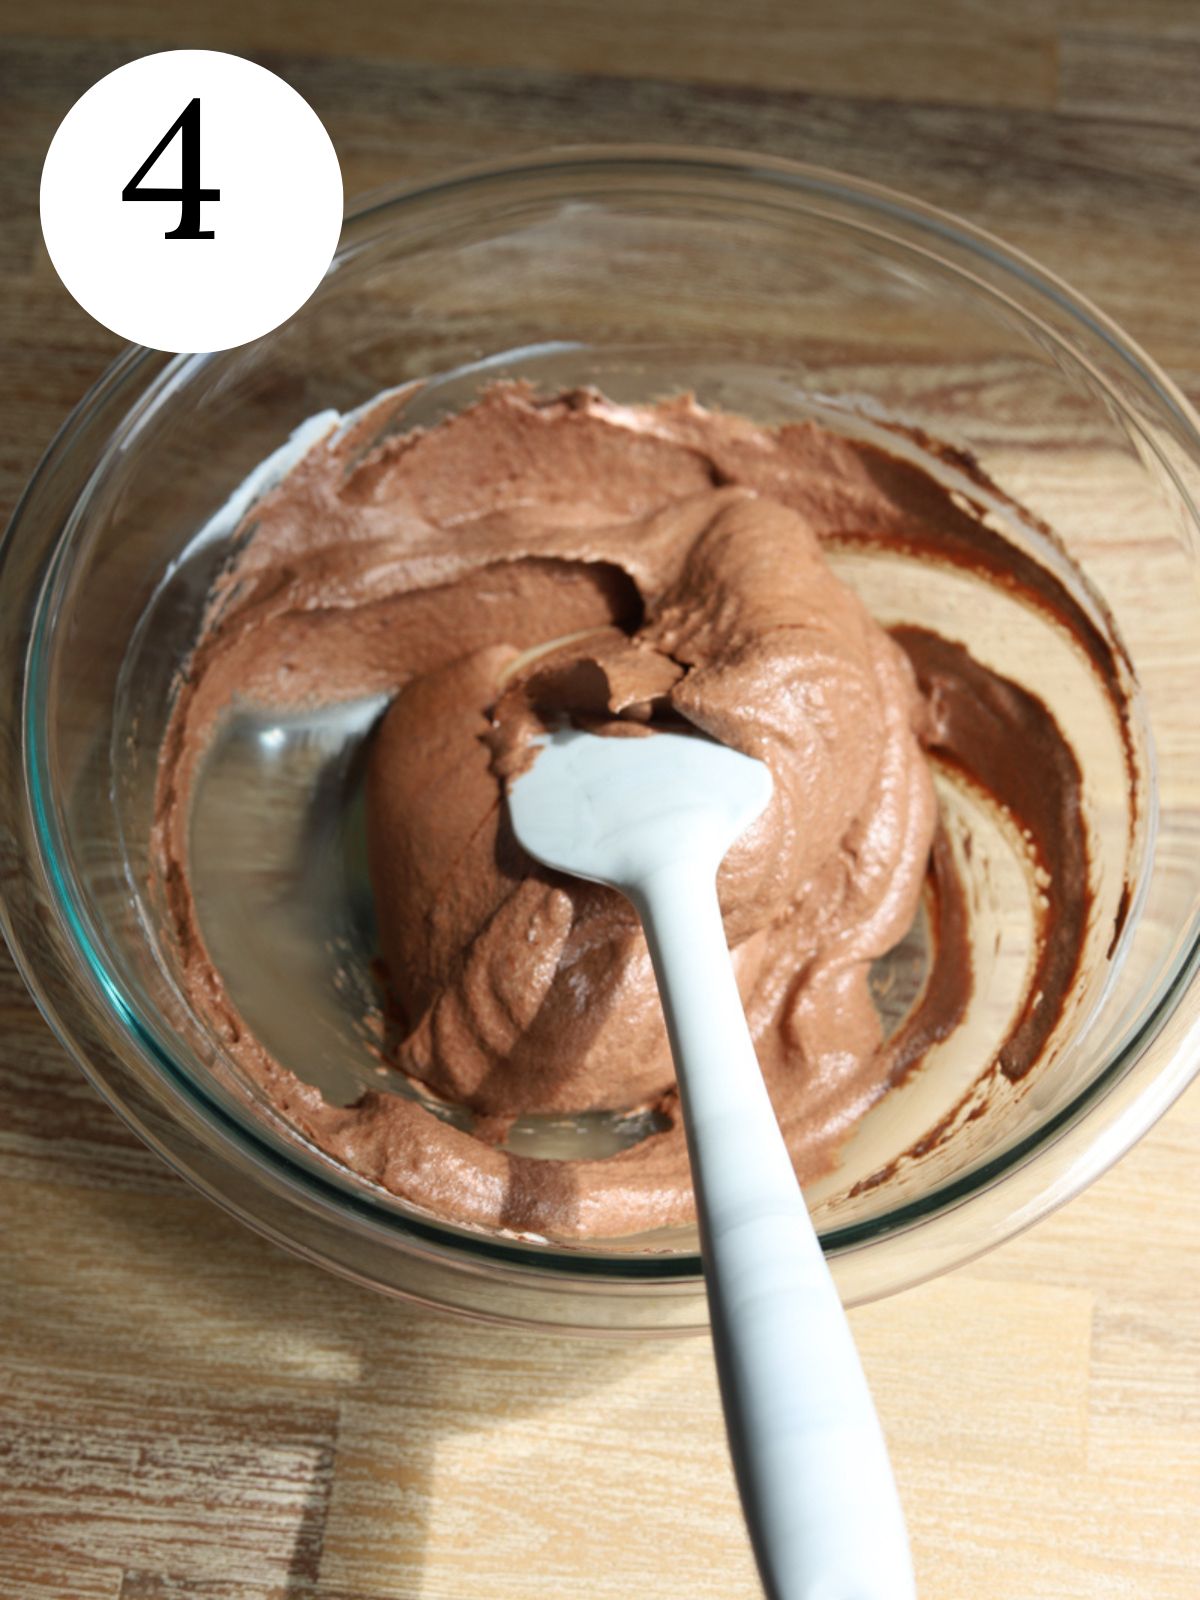
Step 4: Add the cooled chocolate mixture and gently fold to combine.

Step 5: Divide the mixture between 3 or 4 ramekins or jars. Do not pack the crust down.
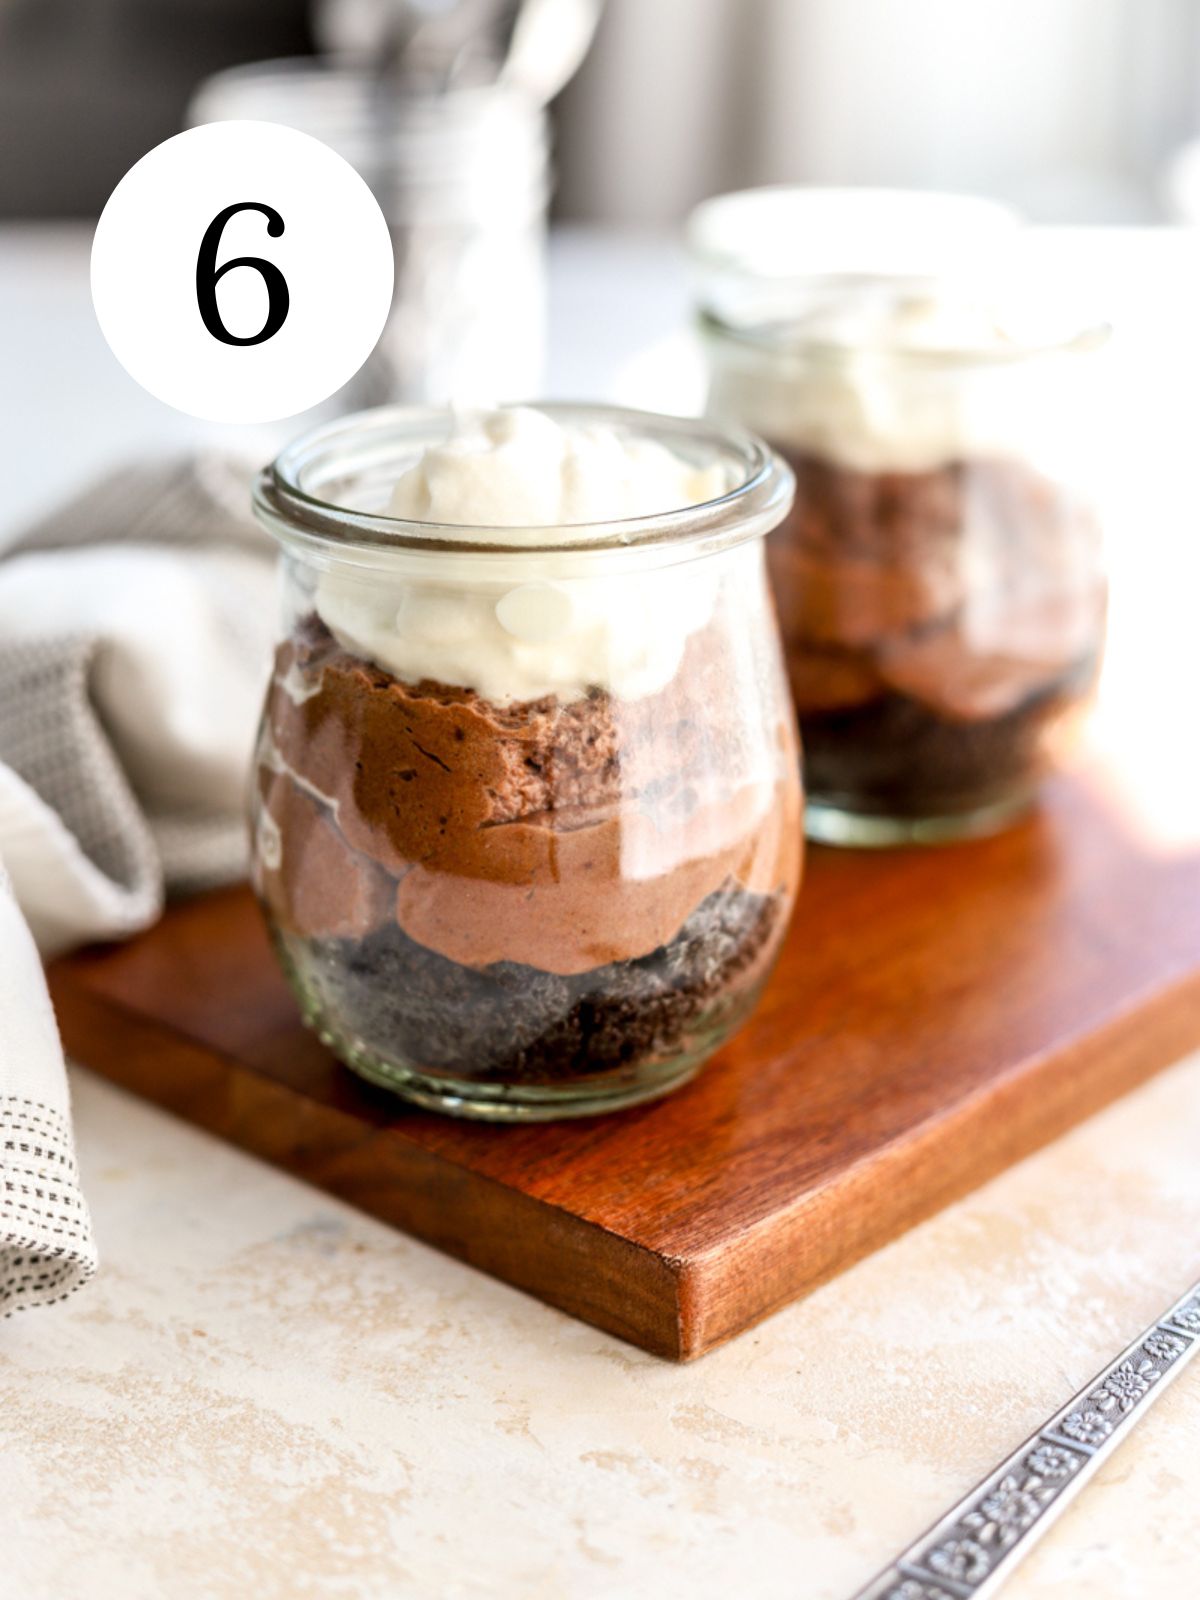
Step 6: Beat the whipping cream on medium-high speed with an electric mixer until soft peaks. Add the powdered sugar and vanilla. Mix until you have medium peaks. Pipe or scoop it on top of the chilled mini pies.
Natalie’s Top Tips
- Make sure your cream is cold. Cold cream whips better. Keep it in the fridge until you’re ready to use it.
- Crush the Oreos to fine crumbs with a food processor or put them in a zip lock bag and crush them with a rolling pin.
Recipe FAQs
Stiff peaks are when the mixture holds its shape and peaks stand straight up. Lift beaters up or whisk attachment up to check.
Yes! Double the ingredients to make 6 mini chocolate pies.
Store leftover chocolate mini pies in an airtight container in the refrigerator for up to 4 days. It’s best to make and add the whipped cream right before serving.
More Recipes You’ll Love

Mini Chocolate Pies
Equipment
Ingredients
Oreo Crust
- 12 (144 g) Oreo cookies finely crushed into crumbs
- 3 tablespoons (42 g) butter melted or browned
Chocolate Pie Filling
- ⅔ cup (120 g) semi-sweet chocolate chips or chopped chocolate
- ¾ cup (178.5 g) heavy cream cold, divided (¼ cup for ganache, ½ cup for whipping)
Whipped Cream Topping (optional)
- ¼ cup (59.5 g) heavy whipping cream cold
- 1 tablespoon (8 g) powdered sugar
- ⅛ teaspoon vanilla extract
Instructions
Oreo Crust
- For the butter, you can simply melt it in the microwave or you can brown the butter for extra flavor.
- To brown the butter (optional), add the butter to a skillet over medium low heat. Stir occasionally. Once the butter starts to sputter, whisk for about 4 minutes. The butter will start to foam. Next, you’ll notice little bits at the bottom of the skillet. When the bits become light brown and the butter begins changing color, remove the skillet from heat. Pour into a heat safe bowl and allow to cool to room temperature.
- To make the crust with a food processor: Add the Oreos (including the cream filling) to a food processor. Pulse them into fine crumbs. Add the slightly cooled melted butter or brown butter and pulse to combine. The mixture should be thick and quite wet.
- To make the crust without a food processor: Place the Oreos in a zip lock bag and crush them with a rolling pin. Pour the Oreos into a medium sized mixing bowl. Stir in the slightly cooled butter to combine.
- Divide the mixture between 4 ramekins, jars, or mugs. Lightly press the crumbs into the bottom of each. Avoid packing them too firmly, or the crust can become hard.
Chocolate Pie Filling
- Add the chopped chocolate or chocolate chips and 1/4 cup of the heavy cream to a medium sized heat proof bowl.
- Heat for 15 seconds in the microwave. Stir well then heat another 10 seconds in the microwave. Stir til chocolate has melted completely. If it's not fully melted, microwave in 5-second bursts, stirring between each.
- Let the chocolate mixture cool to room temperature (about 10 minutes). It should no longer feel warm before folding it into the whipped cream.
- Pour the remaining ½ cup of cold heavy cream in the bowl of an electric mixer fitted with the whisk attachment (or in a large mixing bowl). Whip the heavy cream to stiff peaks.
- Use a spatula to fold the cooled chocolate mixture into the whipped cream just until no streaks remain. Avoid overmixing to keep the filling light and airy.
- Spoon or pipe the chocolate filling evenly into the jars. Top with whipped cream and enjoy or cover with plastic wrap. Chill for at least 2 hours, or overnight for the best texture. Top with fresh whipped cream right before serving.
Whipped Cream Topping (optional)
- Before serving and after the mini pies have finished chilling, make the whipped cream.
- In the bowl of an electric mixer fitted with the whisk attachment or in a large bowl using a hand held mixer, beat the whipping cream on medium-high speed for a few minutes. When you have soft peaks, gently pour the powdered sugar in followed by the vanilla. Continue mixing until you have medium peaks.
- Pipe or scoop it on top of the chilled mini pies! Enjoy as is or top with crushed Oreos, chocolate shavings, fresh berries, or sprinkles, if desired.
Video
Notes
Nutrition
Please note that nutritional values are created by an online calculator and should only be used as an estimate.
Morgan
this recipe seems to be missing information in the chocolate pie filling section- how much heavy cream gets melted with the chocolate chips and how much gets whipped cold?
Natalie
Hi Morgan, I’m so sorry about that and appreciate you pointing that out. I just updated the recipe with the precise amount of heavy cream for the chocolate section. Please let me know if you have any other questions and hope you enjoy the recipe. Have a nice day! 🙂