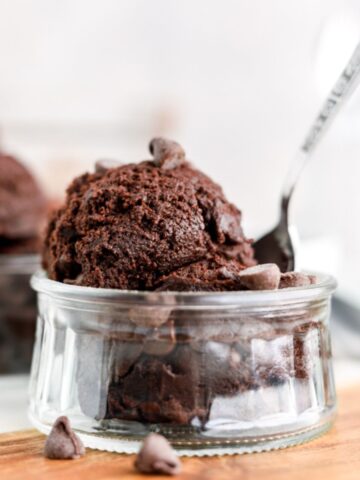
These Edible Cookie Dough Bites are sweet cookie dough balls with chocolate chips. They’re no bake treats that come together with a simple 7-ingredient filling. Enjoy them plain or coated with melted chocolate!

Would you like to save this?
These chocolate chip cookie dough bites are egg free and made with heat treated flour so they’re totally safe to eat! They’re super easy to make and perfect for sharing!
This recipe for cookie dough bites is as perfect for sharing as my chocolate dipped peanut butter balls.
For cookie dough you can eat with a spoon, try my sugar cookie edible cookie dough and biscoff cookie dough!
Jump to:
Why We Love This Recipe
- They’re made without eggs and with heat-treated flour. This makes them completely safe to eat just like this Reese’s peanut butter cookie dough.
- Make-ahead and freeze for up to 3 months!
- They’re customizable just like my rice krispies treats with chocolate chips! Enjoy them plain or dipped in chocolate. Use milk chocolate, semi-sweet, white or dark. Add butterscotch too, if you like.
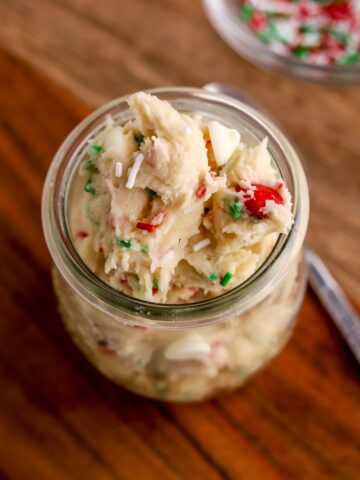
- Add these homemade cookie dough bites to your Christmas cookie boxes or make them for holiday parties. Everyone will love them!
Ingredients

Below are useful notes on some of the ingredients in these no bake cookie dough bites.
- Butter: Use salted or unsalted room temperature butter.
- Brown sugar: Use light or dark brown sugar. Make sure your brown sugar is fresh!
- Milk: Milk gives this cookie dough its creamy texture.
- Flour: I recommend all-purpose flour. The flour is heat treated to kill any possible bacteria in the flour. Heat treating can be done in the microwave or oven. See instructions in the recipe card.
- Salt: A pinch of salt brings out the flavor and balance out a little of the sweetness.
- Chocolate chips: Use regular or mini semi-sweet chocolate chips for the filling just like the filling in my chooclate cookie dough blizzard! You can also use melted chocolate chips for the optional chocolate coating. Chocolate chip cookie dough fans will also love these homemade cookie dough ice cream sandwiches.
- White chocolate (optional): Use white chocolate chips, semi-sweet chocolate chips, white chocolate bars or a combination of the two for the coating.
- Oil (optional): Oil is optional but recommended. It makes the chocolate coating a little smoother.
Please see recipe card below for full list of ingredients and their measurements.
Substitutions & Variations
- Add some sprinkles to the filling or sprinkle on top of the melted chocolate before it sets. Use rainbow, Christmas, or any type of sprinkles.
- Swap in heavy cream in place of milk.
- Salted butter can be used in place of unsalted butter. If you use salted butter, you most won’t need to add any salt.
- Sprinkle a little flaky sea salt over the melted chocolate before it sets. Sea salt enhances the flavor of the chocolate and balances the sweetness.
- Swap in plant based milk and vegan butter to make this dairy free!
- Instead of vanilla, add a little almond extract or peppermint extract.
Instructions


Step 1: (Photo 1 above) Heat treat the flour in the microwave or oven. Spread the flour on a baking sheet and put it in a 350 F oven for 5 minutes or microwave it for 90 seconds (stir every 30 seconds) until flour reaches 160 degrees F.
Step 2: (Photo 2 above) Mix the butter and sugar. Add the vanilla and milk. Mix in the flour and salt. Stir in the chocolate til just combined. Set in the fridge for 10 minutes.


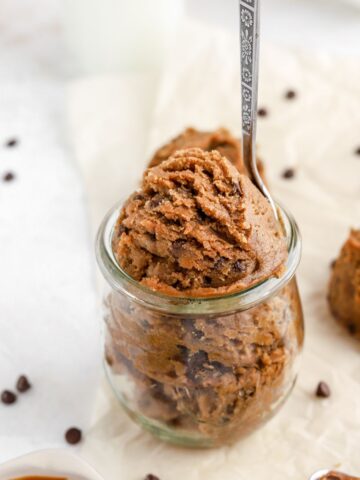
Step 3: (Photo 3 above) Form the dough into 1/2″ balls and place them on a baking sheet lined with parchment paper. Freeze for 15 minutes.
Step 4: (Photo 4 above) Enjoy the balls as is or dip them in or drizzle them with chocolate. Use all one type of chocolate or two types (as pictured) Melt the chocolate chips and a little oil in the microwave at 20 second intervals at 50% power. Stir in between until melted. Dip balls in chocolate. Set on parchment paper. Place in the fridge for a few minutes to allow chocolate to set.
Recipe FAQs
Yes! You can store the dough in an airtight container in the fridge for up to 2 days before rolling it into balls.
Yes! Use plant based milk and vegan butter to make these dairy free. Swap in a 1:1 Gluten free flour for a gluten free option.
Store chocolate covered cookie dough bites in an airtight container in the fridge for up to 1 week or freeze for up to 3 months. Thaw in the fridge or at room temperature.

Expert Tips
- Add any sprinkles or decorations immediately after coating with chocolate. Toppings won’t stick after the chocolate hardens.
- Use a small cookie scoop for evenly portioned bites.
- If the chocolate gets too thick before you finish coating all the balls, microwave it for another 10 seconds or so then give it a stir.
- Enjoy the bites in the fridge for best flavor and texture!
More Recipes You’ll Love

Did you try this recipe or any other recipe on my website? Please leave a 🌟 star rating and 📝 comment below.
Don’t forget to tag me on Instagram, Facebook, and Pinterest!

Edible Cookie Dough Bites
Ingredients
Edible Cookie Dough Filling
- 1¼ cups (156.25 g) all purpose flour heat treated (instructions below)
- ½ cup (113.5 g) unsalted butter room temperature
- ¾ cup (165 g) light brown sugar packed
- 2 teaspoons (2 teaspoons) vanilla extract
- 2 tablespoons (29.57 ml) milk or heavy cream
- ½ teaspoon (½ teaspoon) salt
- ¾ cup (135 g) semi-sweet chocolate chips regular or mini
Chocolate Topping (optional)
- 1 cup (180 g) semi-sweet chocolate chips
- 1 cup (180 g) white chocolate chips or white chocolate bars from the baking aisle, chiopped
- 1 teaspoon (1 teaspoon) vegetable oil divided
Instructions
Edible Cookie Dough Filling
- Start by heat treating the flour in the oven or microwave. To use the oven, preheat oven to 350 F. Spread the flour evenly on a baking sheet lined with parchment. Bake five minutes. Cool completely. To heat treat flour in the microwave, microwave the flour in a bowl in 30 second intervals, stirring in between, for up to 90 seconds. Flour should reach 160℉. Allow flour to cool.
- In a large bowl or the bowl, use an electric mixer to mix the butter and brown sugar on medium speed til creamy and combined. Mix in the vanilla and milk. With the mixer on low, mix in the dry ingredients til just combined. Stir in the chocolate with a spatula til just combined. Chill the dough in the fridge for 10 minutes.
- Form dough into 1/2" balls. Roll them into balls with your hands and place on a baking sheet lined with parchment paper. Place balls in freezer for 15 minutes.
- If using one type of chocolate, add the 2 cups of chocolate and 1 teaspoon of oil to a microwave safe bowl. If using two types of chocolate, add 1 cup of white chocolate and 1/2 teaspoon of oil to one bowl and 1 cup of semi-sweet chocolate and 1/2 teaspoon of oil to another bowl.
- Melt the chocolate with oil in a microwave safe bowl on 50% power for 20 second intervals. Stir every 20 seconds. Once chocolate is melted, take frozen cookie dough balls out of the freezer.
- Coat balls one at a time in the chocolate. Place balls on back on the baking sheet lined with parchment paper. If you want to top with any sprinkles or flaky sea salt, do so before the chocolate sets.
- Continue with the rest of the balls. If you want, you can fill a pastry bag or zip lock bag with melted chocolate Snip a small hole in a corner and decoratively pipe chocolate on top of the balls.
- Set the baking sheet in the fridge for about 10 minutes or til the chocolate sets. Enjoy!
Notes
Nutrition
Please note that nutritional values are created by an online calculator and should only be used as an estimate.
Barbara Briggs Ward
SO pretty to look at and delicious to the taste!
Natalie
Thank you!! They definitely are super pretty and delicious! 🙂