
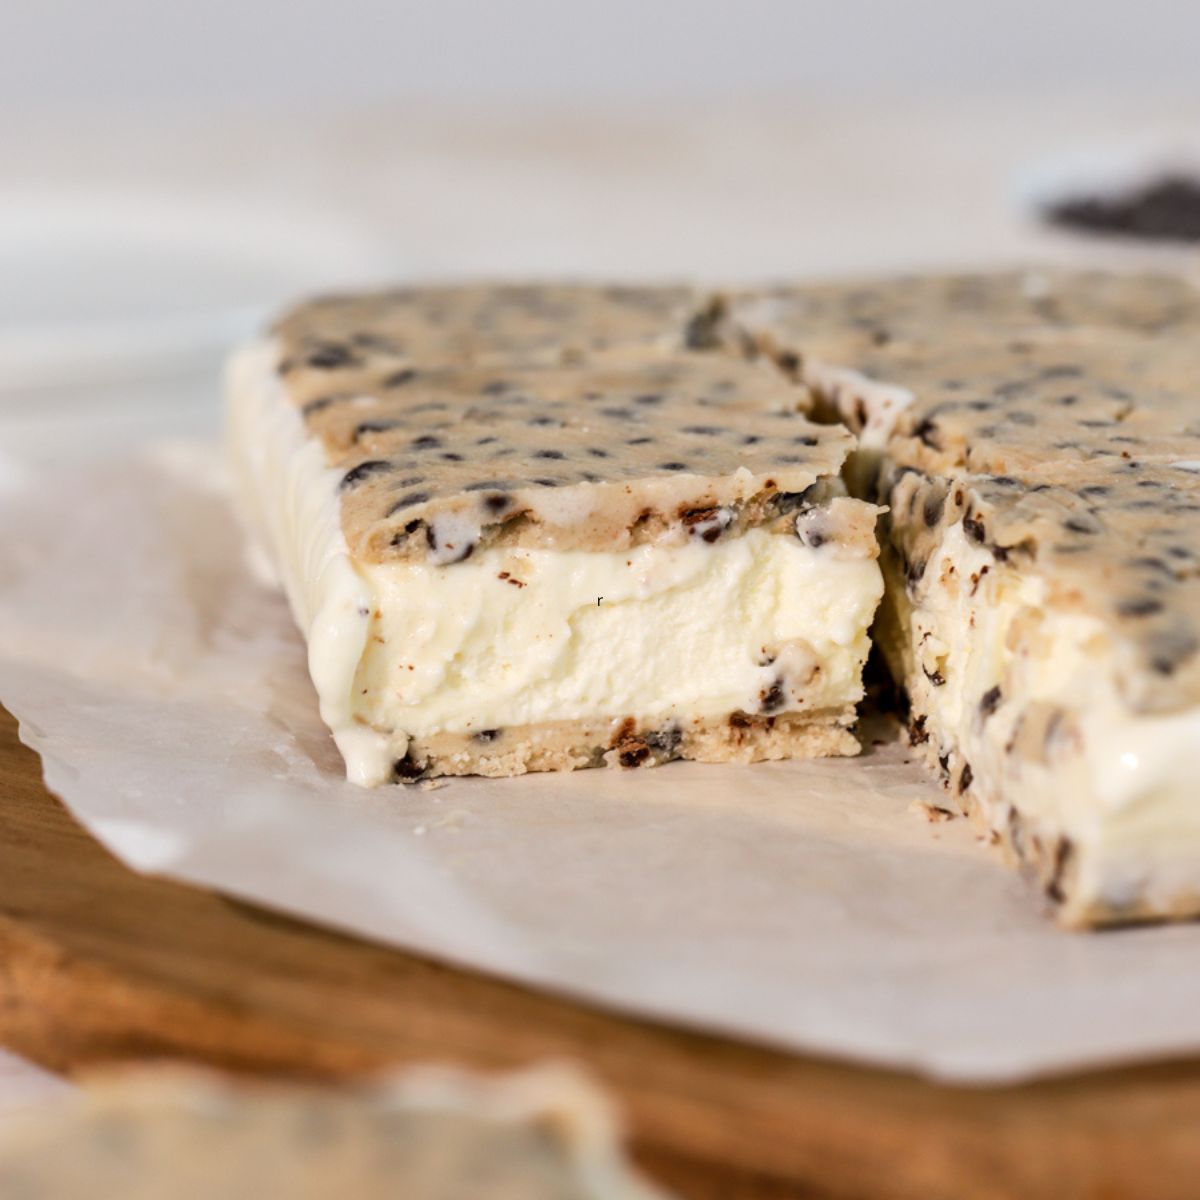
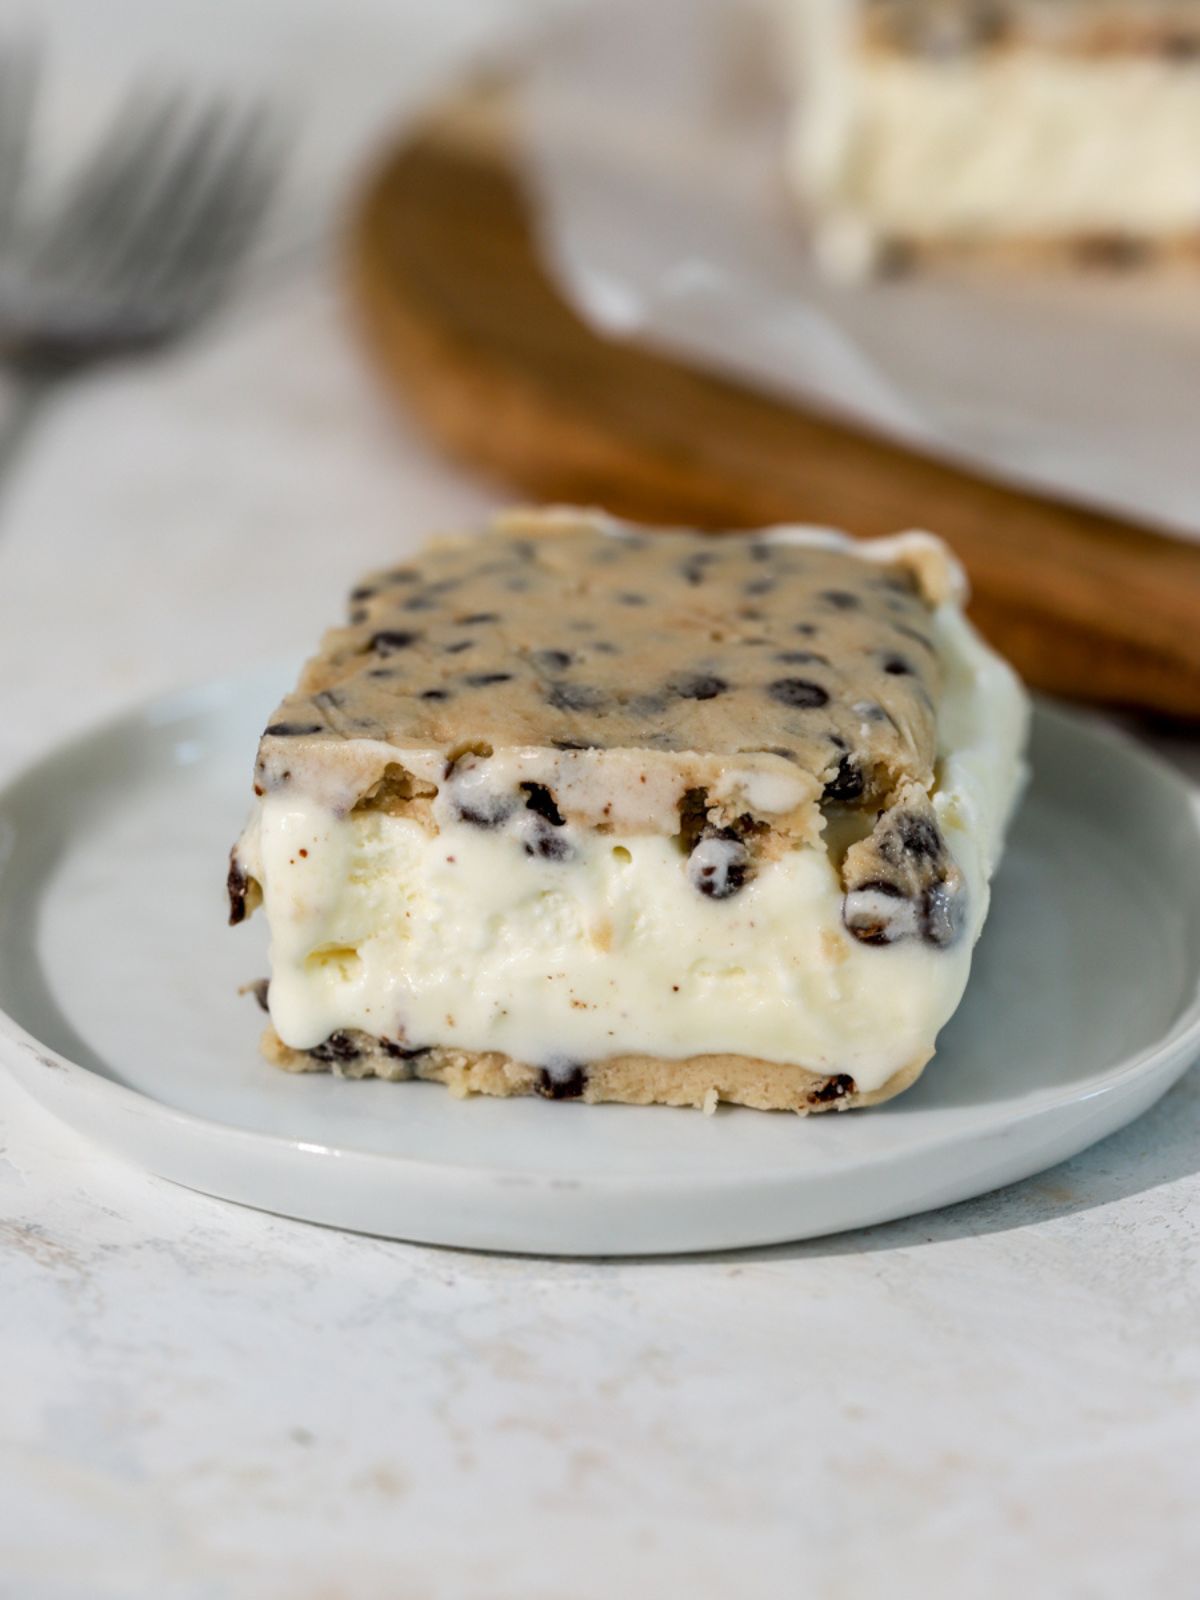
Cookie dough ice cream sandwiches are made with layers cookie dough with a layer of ice cream in the middle. No baking required for this easy summer dessert!
Would you like to save this?
Cookie dough ice cream bars are a fun twist on the classic ice cream sandwich! Each bite is buttery, cold, and packed with chocolate chips.
They’re a perfect make-ahead dessert—just keep them in the freezer until you’re ready to serve.
I created this recipe because summer is the best time for simple but special frozen treats like croissant with ice cream, cookie dough blizzard, and affogato matcha!
Jump to:
Why You’ll Love This Recipe
- Quick and easy: You can whip up the dough in less than 10 minutes! They’re filled with store bought ice cream which is a huge time saver! The cookie dough doesn’t require any baking just like my sugar cookie edible cookie dough.
- Delicious: The combination of buttery chocolate chip cookie dough and cold ice cream will have you coming back for more!
- Fun summer dessert: They’re rich, nostalgic, and perfect for summer like my s’mores cones and peanut butter jelly ice cream.
- Make ahead: Make them ahead. Keep them in the freezer. Pull them out when you’re ready to serve them!
Ingredient Notes
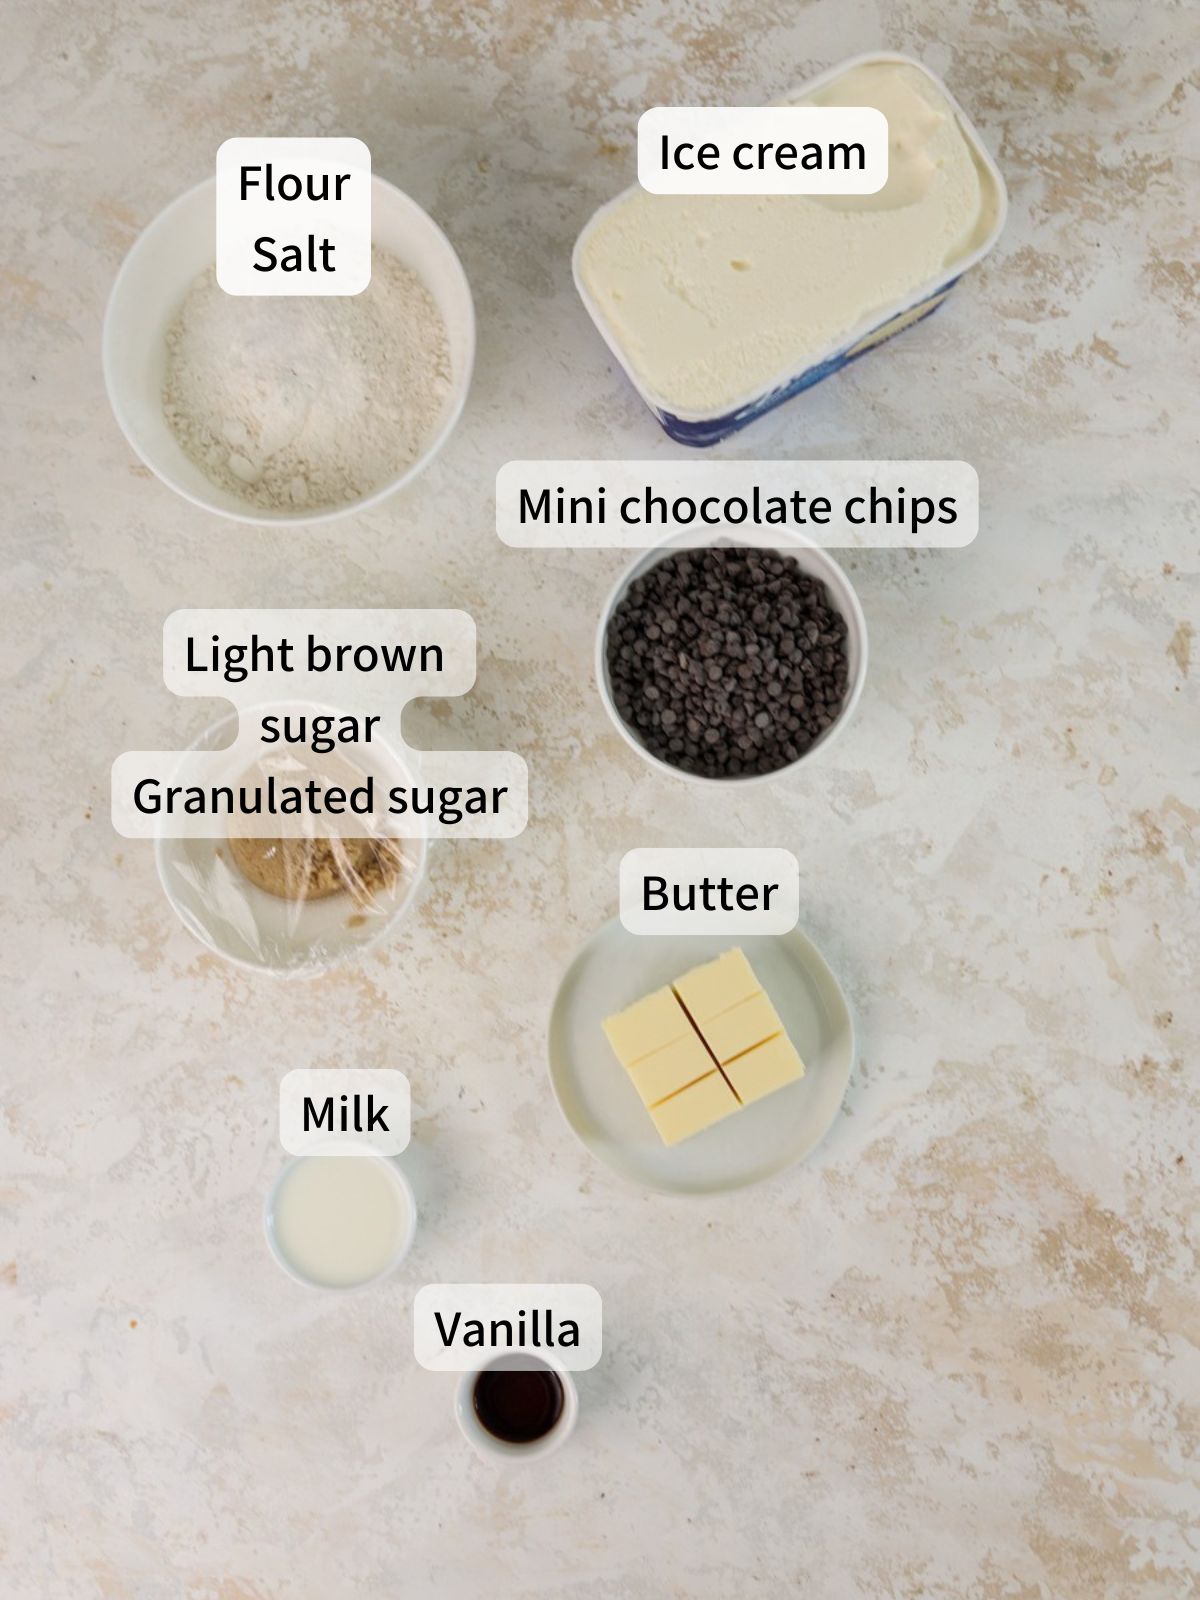
Here are some useful notes on some of the ingredients.
- Mini chocolate chips: I use mini chocolate chips. They’re smaller and easier to cut into. If you have extra mini chocolate chips, make my mini chocolate chip shortbread cookies!
- Butter: Use room temperature butter. It should be about 65°F. I use unsalted butter, but salted butter works too.
- Sugars: We’re using both light brown sugar and granulated sugar for the cookie dough.
- Milk: Milk gives this cookie dough its creamy texture.
- Vanilla extract: Vanilla adds a sweet, warm flavor to the dough.
- All purpose flour: Flour is raw and may contain harmful bacteria. Before making the cookie dough, heat treat the flour. Heat treating can be done in the microwave or oven. It only takes a few minutes and will kill any possible bacteria in the flour.
- Salt: A pinch of salt enhances the flavor of the chocolate chip cookie dough. It also balances out some of the sweetness.
- Ice cream: I usually use store bought vanilla ice cream. You can use any flavor of ice cream- store bought or homemade! Ice cream fans, make sure to also try my homemade strawberry ice cream recipe.
See recipe card below for a full list of ingredients and measurements.
Substitutions and Variations
- Swap in a 1:1 gluten free flour to make the cookie dough gluten free.
- Instead of mini chocolate chips, chop up some bars of dark chocolate! Chop it finely so it’s easy to cut into once frozen.
- Add some finely chopped almonds, walnuts or pecans to the cookie dough!
- Make the cookie dough extra pretty with sprinkles! Sprinkles make everything fun like this funfetti ice cream.
- For an extra decadent flavor, use heavy cream in place of milk.
Step by Step Instructions
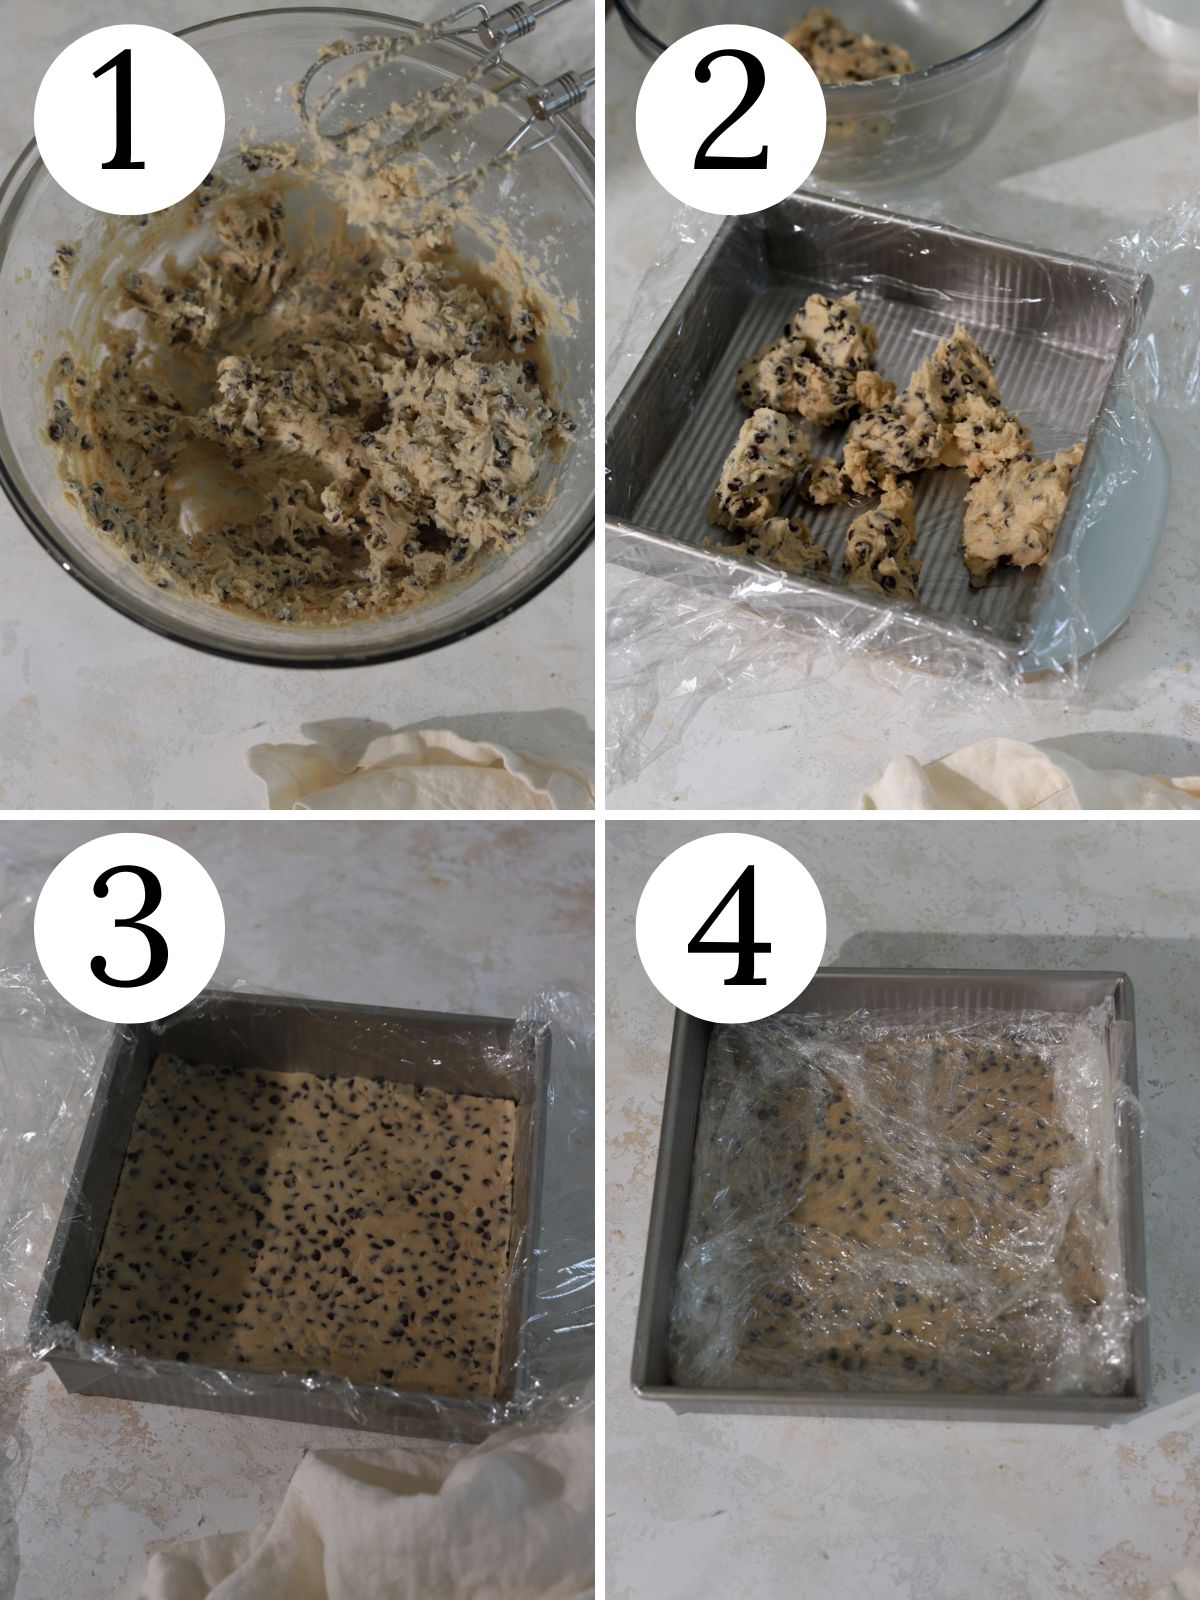
Step 1: (See photo 1 above). Heat treat the flour (see recipe card for simple directions). Beat the sugars and butter til light and fluffy. Add the vanilla and milk. Mix in the heat treated flour and salt followed by the chocolate chips.
Step 2: (See photo 2 above). Line an 8 inch square pan with plastic wrap (or parchment or wax paper). Add half the dough to the pan. Press it with your hands to make an even layer. Next, I recommend laying a strip of parchment paper over the cookie dough. This makes it easier to split the two layers after they freeze.
Step 3: (See photo 3 above). Fit another sheet of plastic wrap in the pan. Spread the rest of the cookie dough over the plastic wrap the same as the first layer.
Step 4: (See photo 4 above). Fold the edges of plastic wrap inside to cover the dough. Freeze til solid, for about 1 hour.
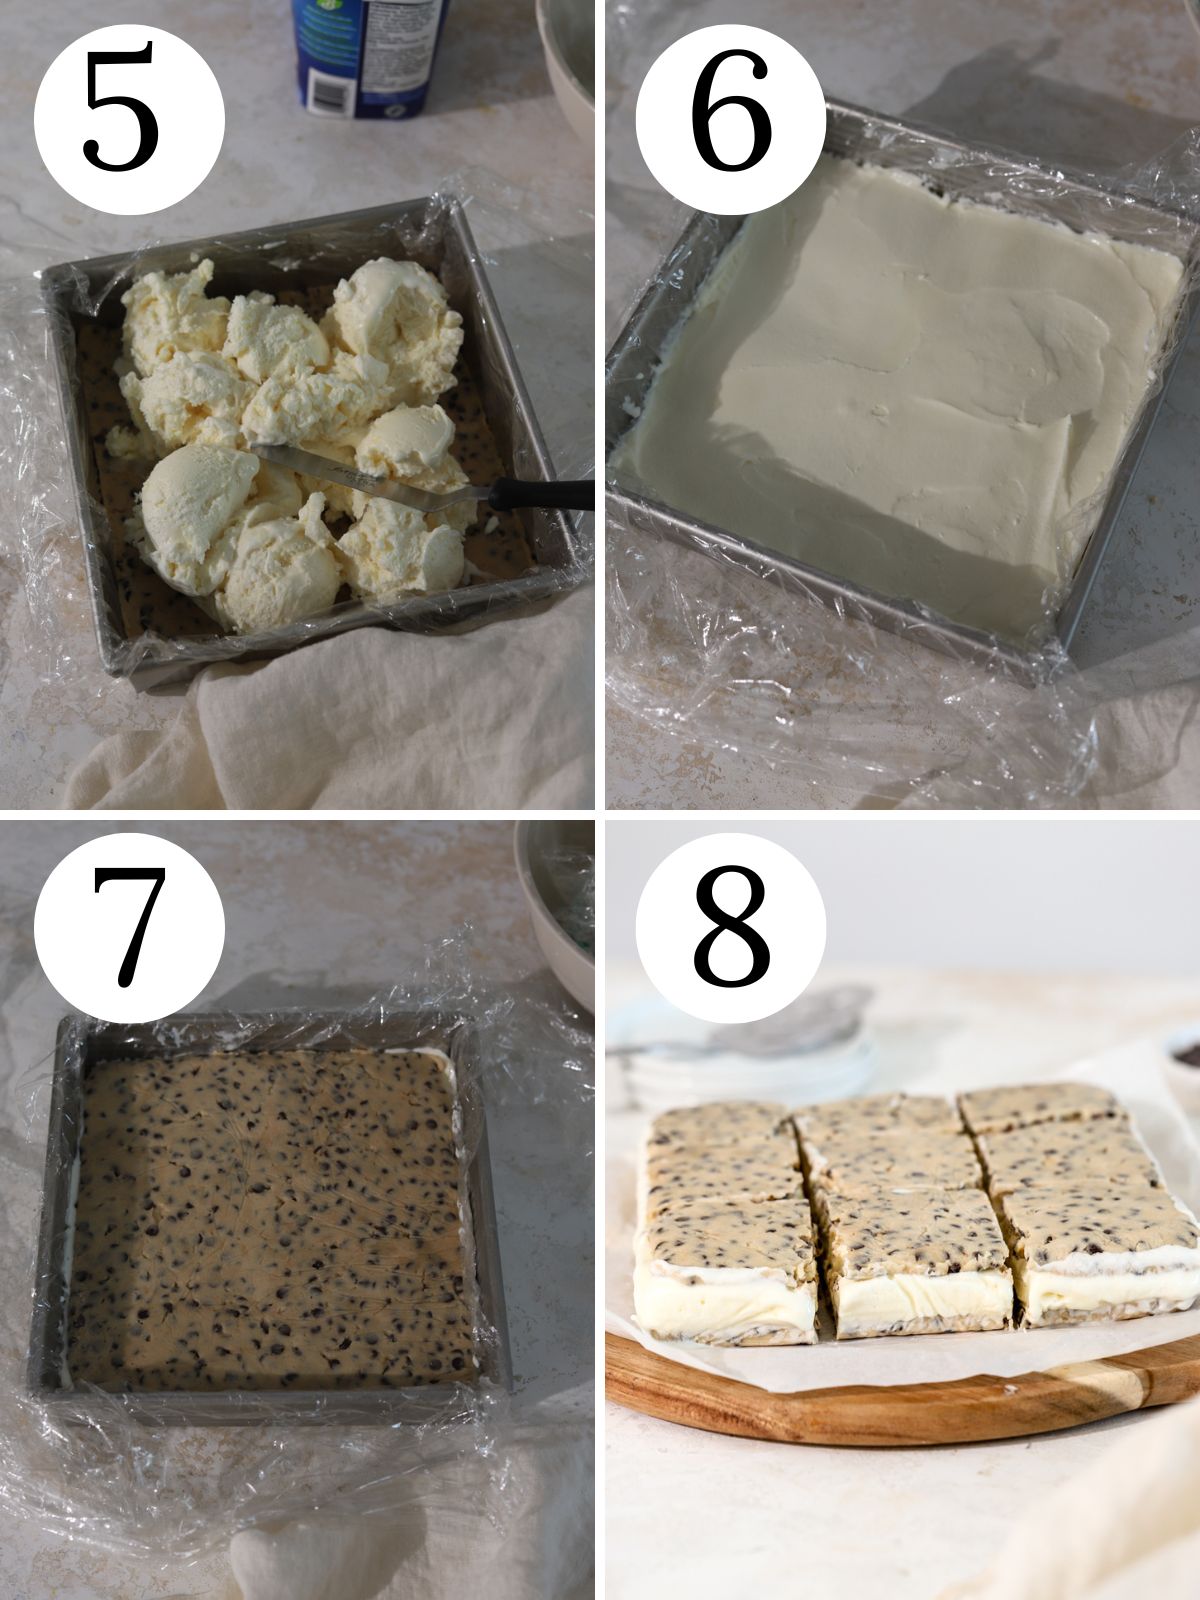
Step 5: (See photo 5 above). Take the layers of cookie dough out of the pan. Line the pan with a new layer of plastic wrap. Unwrap the two layers of cookie dough and peel the plastic wrap off. Lay one layer of cookie dough on the bottom of the pan. Top with ice cream.
Step 6: (See photo 6 above). Spread the ice cream evenly with an offset spatula or spatula.
Step 7: (See photo 7 above). Top with the other layer of cookie dough. Press down lightly. Wrap pan tightly with plastic wrap. Freeze for at least 4 hours or overnight.
Step 8: (See photo 8 above). Set the bars on a cutting board. Slice with a long, sharp knife. Serve right away or freeze til ready to serve.
Expert Tips
- Flour is raw and may contain bacteria. Kill bacteria by heating flour to 165°F. I prefer to use a microwave to do this since it’s faster. You can also heat the flour in the oven. Make sure you are stirring the flour. Use a thermometer to be sure all the flour has reached the temperature needed.
- Once you get the hang of freezing cookie dough, you can make these brownies using Nutella! Everyone will be so impressed by the layer of Nutella!
- Use room temperature butter. It usually takes 1-2 hours for butter to be room teperature, depending on the temperature of your kitchen.
- Place the bars back in the freezer for a few minutes after slicing them. This gives the ice cream time to freeze up again before eating.
- Use a long, sharp knife to cut these. For cleanest slices, run the knife under hot water and wipe the knife clean after each cut.
Recipe FAQs
Cookie dough is made without heat treated flour and with eggs. It is not safe to eat. Edible cookie dough is safe to eat because the flour is heat treated and it’s made without eggs. Heat treating the flour is a precautionary step to kill off any existing bacteria.
No. You should heat treat the flour, but the dough does not need to be baked.
No, this step is important. Flour is raw and can contain harmful bacteria. It’s vital you heat it to 165°F.
Wrap each sandwich tightly in plastic wrap then place them in a freezer safe bag or container. Freeze for up to 1 month.
More Recipes You’ll Love


Did you try this recipe or any other recipe on my website? Please leave a 🌟star rating below and let me know how you enjoyed it in the 📝 comments below.
Don’t forget to tag me on Instagram, Facebook, and Pinterest!

Cookie Dough Ice Cream Sandwiches
Ingredients
- 1¼ cup (156.25 g) all purpose flour heat treated (directions below)
- ½ cup (113.5 g) unsalted butter room temperature
- ⅓ cup (73.33 g) light brown sugar packed
- ⅓ cup (66.67 g) granulated sugar
- 1½ teaspoons (1½ teaspoons) vanilla extract
- 2½ tablespoons (22.18 ml) milk or heavy cream
- ½ teaspoon (½ teaspoon) salt
- ¾ cup (135 g) mini chocolate chips
- 1 quart (946.35 g) vanilla ice cream 1 quart equals 4 cups. You can use a little more or less than this if you prefer.
Instructions
- Heat treat the flour. Microwave the flour in a microwave safe bowl for about three to four 30-second intervals stirring in between intervals or until flour reaches 165°F on an instant read kitchen thermometer. Alternatively, spread flour on a baking sheet and bake at 350°F for 6 minutes. Give flour a stir then set it aside for a couple of minutes to cool down.
- In a large bowl or in the bowl of an electric mixer, cream the sugars and butter on medium until creamy and combined, about two minutes. Add the vanilla followed by the milk or heavy cream.
- Turn the mixer on low and add the flour and salt until combined and only a few streaks of flour remain. Stir in the mini chocolate chips.
- Line an 8 inch square pan with plastic wrap (or parchment or wax paper). Whatever you use, try to fit it nicely in the pan and make sure it covers the bottom and sides completely.
- Scatter half the dough in the pan. Press it with your hands to make an even layer. Lay one strip of parchment paper over the cookie dough. Next, line the pan with another plastic wrap (or parchment or wax paper). Spread the rest of the dough in an even layer.
- Fold the edges of plastic wrap to cover the dough. Freeze til solid, for about 1 hour.
- Take the ice cream out for a few minutes. This gives it a little time to soften and become easier to spread.
- Lift the layers of cookie dough out of the pan. Unwrap them and carefully peel the plastic wrap or parchment paper off each layer.
- Line the pan with a new layer of plastic wrap. Place one of the cookie dough layers smooth side down. Top with ice cream. Spread the ice cream into a smooth layer preferably using an offset spatula. Carefully place the other layer of cookie dough on top smooth side up. Press down lightly.
- Wrap pan tightly with plastic wrap. Freeze for at least 4 hours or overnight.
- Set the bars on a cutting board. Slice with a long, sharp knife. For best results, place the sliced bars back in the freezer for a few minutes after slicing then serve right away or freeze til ready to serve.
- Enjoy immediately!
Notes
Nutrition
Please note that nutritional values are created by an online calculator and should only be used as an estimate.
Leave a Reply